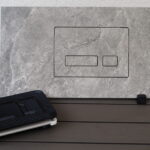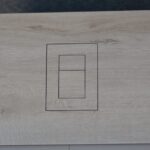
A bathroom can have premium tile, refined fixtures, and carefully chosen lighting, yet still feel unfinished because of one visible detail: a wall-mounted brush, a bin on the floor, a protruding toilet paper holder, or a towel hook added after the tile work. This tile integration guide explains how to plan these elements as part of the wall itself. The result is a cleaner, more elegant room where function is present but visual noise is not.
Integrated bathroom accessories are not decorative extras. They affect the wall construction, tile layout, waterproofing, and everyday cleaning. That is why the strongest results are decided before the installer opens the first box of tile.
Start With the Bathroom Wall, Not the Accessory
A recessed accessory only looks effortless when its dimensions, location, and finish have been coordinated with the complete bathroom design. Treat every integrated element as a small architectural opening. It needs a defined place in the wall, a suitable structural depth, precise edges, and a tile layout that makes the recess look intentional.
The first decision is what should disappear into the wall. A concealed toilet brush, recessed waste bin, hidden toilet paper holder, flush plate, or under-tile towel hook can each remove an object from sight. However, not every wall is suitable for every component. A solid masonry wall may require cutting and preparation, while a stud wall needs enough cavity depth and a correctly designed supporting structure.
Before selecting products, identify where the toilet frame, water supply lines, electrical wiring, ventilation ducts, and drainage pipes sit. The wall behind a wall-hung toilet is especially busy. A concealed accessory placed without a coordinated plan can conflict with the flush frame or service access. This is a design issue, but it is also a construction issue.
Define What the Room Needs to Hide
Minimalism works best when it solves a real daily problem. A small guest bathroom may benefit most from a recessed toilet paper holder and toilet brush because they free up the limited floor area. A larger primary bathroom may prioritize an integrated waste bin and towel hooks to preserve the calm, open surfaces around the vanity and shower.
Think about use, not only appearance. A toilet brush should be accessible without becoming a visual focal point. A waste bin should be easy to empty and placed where it is genuinely useful. Towel hooks need enough clearance for fabric to dry, even when their visible face is nearly flush with the tile.
There is also a practical trade-off between maximum concealment and service access. The more completely a component is integrated, the more important it is to choose a system designed for removal, cleaning, and maintenance. A refined bathroom should not require complicated disassembly for ordinary tasks.
Plan Around Real Movement
Stand in the proposed room layout and consider how people move through it. Do not position a recessed bin where an open door blocks access. Keep toilet paper within comfortable reach from the seated position. Avoid locating hooks where wet towels touch the toilet, vanity edge, or heated towel rail.
For families, accessibility and durability may take priority over an ultra-minimal arrangement. For a compact powder room, visual restraint and floor clearance may be the main goal. The right solution depends on the room and the people using it.
Coordinate Tile Layout Before Rough-In
Tile is the visible finish, but it should guide the entire installation. The dimensions of the accessory opening should be coordinated with the tile module, grout joint width, and intended edge lines. When this happens early, tile cuts can be balanced and symmetrical. When it happens late, even a high-quality accessory can look inserted rather than integrated.
Start by establishing the visual centerline of the wall. This may be the center of the toilet, the flush plate, the vanity, or a vertical grout joint. Then mark the accessory location relative to those reference points. A concealed toilet brush or paper holder often looks best when aligned with surrounding joints rather than placed arbitrarily between them.
Large-format tile demands even greater precision. One poorly planned cut can become highly visible across a broad, uninterrupted surface. Smaller tile offers more flexibility, but it creates more joints that must align cleanly around the opening. Neither format is automatically easier. The installation method must match the tile size, pattern, and material.
Choose the Edge Strategy
The transition between tile and integrated accessory is one of the most visible details in the bathroom. Some installations use a precise narrow joint around the frame. Others rely on a tile-ready surface that allows the tile to become the visible face. The correct approach depends on the product design and the desired visual effect.
Avoid improvised edge solutions. Uneven cuts, oversized silicone joints, and inconsistent grout lines draw attention exactly where the design is supposed to remain quiet. Use the specified finishing method and maintain consistent spacing on all sides.
Build the Opening With Waterproofing in Mind
A recess in a bathroom wall is not simply a hole cut into substrate. It is a detail that must be structurally stable, correctly waterproofed, and ready to accept tile. The frame must not move under pressure, and the surrounding wall must remain flat. Even minor movement can lead to cracked grout or misaligned edges over time.
Waterproofing must continue cleanly around the opening according to the selected system and local building requirements. This is particularly important near showers, tubs, or wet zones. A recessed accessory outside the direct splash area still benefits from careful moisture management because bathrooms experience humidity, cleaning water, and condensation.
The installer should complete the rough opening before final tile cuts are made. Dry-fit the component, verify its depth, check that the visible face will sit as intended relative to the finished tile surface, and confirm that doors, drawers, and toilet lids have adequate clearance.
PS-Tile solutions are designed around this principle: technical precision behind the tile, clean functionality in front of it. The product should support the architecture of the room rather than compete with it.
Use Templates and Cutting Tools for Accuracy
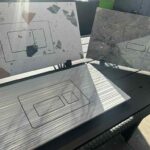
An integrated detail leaves little room for correction. A few millimeters can determine whether an opening looks centered and refined or visibly uneven. Templates are particularly useful when working with compatible concealed sanitary systems, including common in-wall toilet frames. They help position openings accurately before tiling and reduce unnecessary measuring on site.
Tile cutting should be selected based on the material. Porcelain, ceramic, sintered stone, and natural stone respond differently to cutting pressure and blade quality. A diamond blade suited to the material helps create clean edges, while a stable manual cutter can improve speed and consistency on repeated straight cuts. For detailed adjustments, a compact precision tool may be the better choice.
Do not treat cutting as the final step. Measure the actual installed opening, not only the nominal product dimensions. Check tile thickness, adhesive bed, joint width, and any trim or frame tolerance. Then dry-fit the cut tile before applying adhesive.
Installation Sequence That Protects the Finish
The order of work matters. First complete wall preparation, plumbing and frame installation. Then set the recessed body securely, waterproof the surrounding area, and confirm the finished depth. Only after these steps should the tile layout be transferred to the wall and cuts prepared.
During tile installation, keep adhesive out of moving parts, drainage areas, removal points, and hardware interfaces. Protect exposed edges from scratches and prevent grout haze from drying on metal or finished surfaces. Install removable inserts, lids, brush containers, and face elements only after grouting and final cleaning are complete.
A common mistake is rushing the final few centimeters because the main tile field is already finished. These small details are where premium bathrooms are won or lost. Check level, plumb, joint consistency, and the operation of every moving part before handing over the room.
Maintain the Clean Effect After Installation
The value of under-tile integration becomes most obvious during everyday use. With fewer floor-standing accessories, the bathroom is easier to mop and visually calmer. Dust does not collect behind a freestanding bin, and the toilet area has fewer objects competing for space.
Maintenance should still be simple and deliberate. Empty integrated bins regularly, rinse removable brush containers, and use cleaning products suitable for the accessory finish and surrounding grout. Avoid abrasive pads on visible metal surfaces. If the tile or grout is dark, watch for mineral residue around edges so the recessed detail continues to read as a precise part of the wall.
A well-planned integrated accessory does more than save space. It gives the room a sense of order that remains visible long after the renovation is complete. When every practical object has a considered place, the tile becomes more than a surface – it becomes the quiet structure of a better bathroom.