
Porcelain is often the surface that defines a premium bathroom. Its large format, low water absorption, and refined finish create calm, continuous planes with no visual noise. But one chipped cut around a recessed toilet paper holder, flush plate, or built-in waste bin can interrupt that effect immediately. The right diamond blade for porcelain tile is not simply a cutting accessory. It is the tool that protects the clean geometry of the entire installation.
A precise cut allows the tile to sit tightly around integrated details, with narrow joints and edges that look intentional rather than repaired. For homeowners, that means a more elegant result. For tile installers and designers, it means the finish reflects the quality of the design, not the compromises made during installation.
Why Porcelain Requires a Different Cutting Approach
Porcelain tile is dense, hard, and usually finished with a surface that reveals damage quickly. A standard abrasive wheel, a worn blade, or an aggressive cutting technique can leave small chips along the glaze. Even when the damage is only a few millimeters deep, it becomes visible under bathroom lighting, particularly on matte dark tiles, polished porcelain, and large-format slabs.
The risk increases when making openings for recessed accessories. Straight cuts at the edge of a tile are one thing. Internal corners, narrow strips, cutouts for concealed fixtures, and precise openings around a built-in component demand more control. The tile must be cut accurately before it is installed because a correction after bonding is rarely invisible.
A diamond blade cuts through porcelain with industrial diamonds embedded in its cutting rim. Yet the presence of diamonds alone does not guarantee a clean result. Rim design, blade thickness, cooling method, saw stability, feed pressure, and the condition of the blade all influence the finished edge.
Choosing a Diamond Blade for Porcelain Tile
For porcelain, a continuous-rim or very fine turbo-rim diamond blade is generally the right direction. The continuous rim supports the material throughout the cut and reduces the tendency to chip the surface. Fine turbo patterns can improve cutting speed while still maintaining a clean edge, but the result depends on the particular tile and the quality of the blade.
Segmented blades are effective for many hard building materials, but their open gaps and more aggressive action are less suitable when a visible porcelain edge must remain clean. They can be useful in certain construction tasks, but they are not the first choice for a polished bathroom detail where every cut remains part of the finished architecture.
Blade diameter should match the saw and the depth of cut required. Larger blades can offer greater stability on a professional wet saw, while smaller blades are useful for controlled work with a compact tile saw or angle grinder. The key is not to choose the largest blade available. Choose a blade designed for porcelain and a machine that holds the tile steady without vibration.
Wet Cutting or Dry Cutting?
Wet cutting is usually the most reliable method for visible porcelain cuts. Water cools the blade, manages dust, and helps prevent heat from stressing the tile or glazing its cut edge. It is particularly valuable for long straight cuts in large-format tile, where a stable rail saw and continuous water supply create a more controlled result.
Dry-cut diamond blades have a place on site, especially for short adjustments, notches, and work where moving the tile back to a wet saw is impractical. A quality dry-cut blade designed specifically for porcelain can produce excellent results. The trade-off is that the installer must use a lighter touch, allow the blade to cool, and avoid forcing the cut. Heat is the enemy of a crisp edge.
For premium bathroom work, the best approach is often mixed. Use a wet saw for main cuts and large pieces, then use a suitable dry-cut blade for carefully planned details that cannot be made on the saw. This keeps the installation efficient without sacrificing the calm, precise appearance of the finished wall.
Clean Edges Matter Most Around Built-In Details
Integrated bathroom accessories eliminate the clutter of surface-mounted holders, bins, and brushes. Their value depends on precision. The tile opening is the visible frame of the installation, so it must be straight, consistent, and free from chipped corners.
A recessed toilet paper holder or a concealed waste bin often requires a rectangular opening within a tile field. Measure from the installed frame, not only from a drawing. Verify the opening size, tile joint location, and trim or flange requirements before cutting. If the accessory is designed to sit flush with the tile, even a small measuring error can disrupt the intended clean line.
Avoid positioning narrow tile slivers around an integrated element whenever the layout can be adjusted. A wider, balanced cut looks more deliberate and is less fragile during handling. Designers and installers should review the tile layout before the wall is closed or waterproofing begins, especially when combining large porcelain panels with multiple concealed accessories.
How to Reduce Chipping During the Cut
First, inspect the blade. A blade that has become glazed, dull, warped, or contaminated by softer materials will not cut porcelain cleanly. If it begins to burn the tile, wander from the line, or leave a rough edge, replace or properly dress it before making visible cuts.
Second, support the tile fully. Vibration causes chipping and can crack a narrow section near the end of the cut. On a wet saw, keep the tile flat against the table and guide. On an angle grinder, use a stable work surface and clamp the tile when appropriate. Never try to control a large porcelain piece with one hand while cutting with the other.
Third, let the blade work. Excess pressure creates heat and can cause the blade to deflect. Start gently through the glazed surface, maintain a consistent pace, and slow down as the blade approaches an exposed corner or the end of a cut. For sensitive materials, a shallow scoring pass followed by a second full-depth pass can produce a cleaner line than one fast cut.
Finally, account for the direction of the blade. Depending on the saw and tile finish, cutting with the finished face upward or downward can affect where minor breakout occurs. Test a sample piece from the same tile batch before cutting the tiles intended for the final wall. This small step can prevent an expensive mistake.
Match the Tool to the Detail
Not every porcelain cut needs the same setup. Long perimeter cuts for a large wall tile call for the stability of a wet saw. Small L-shaped notches for pipe penetrations or installation frames may need a compact grinder and a porcelain-specific diamond blade. Tight internal corners often benefit from finishing with controlled passes rather than pushing a single cut beyond its natural endpoint.
A blade should also be selected for the tile thickness. Thin wall tile and 20 mm porcelain pavers do not place the same demand on the tool. Thick porcelain requires enough blade capacity and cooling, while thin tile needs particularly careful handling to avoid edge breakout. Large-format panels introduce another consideration: their size makes support, transport, and accurate alignment just as important as blade choice.
For professional bathroom installations, precision tools are part of the design process. A template for a concealed sanitary system, a reliable cutter, and a suitable diamond blade work together. The result is not merely a functional opening. It is a detail that disappears into the tile surface exactly as intended.
Plan the Cut Before Mixing Adhesive
The cleanest bathroom walls are decided before the first tile is bonded. Confirm the final position of built-in accessories, account for waterproofing layers and installation depths, and map the tile grid around every opening. This is especially important when the room uses rectified porcelain with narrow grout joints, where misalignment cannot hide behind wider spacing.
Keep spare tiles from the same batch for test cuts and unexpected adjustments. Porcelain finishes can vary in hardness, surface treatment, and how they respond to a particular blade. A two-minute test is far more efficient than replacing a damaged centerpiece tile after the layout is already underway.
At PS-Tile, the principle behind every integrated detail is simple: the bathroom should feel ordered, elegant, and free of unnecessary elements. A clean porcelain cut is one of the quiet technical decisions that makes that experience possible. Choose the blade carefully, cut with patience, and let the tile remain what it should be – a continuous, luxurious surface rather than a record of the installation process.
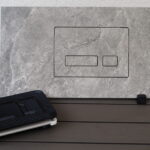
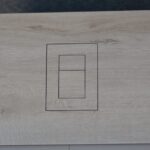

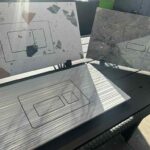
[…] suited to the material. Dense porcelain and large-format slabs require a controlled cut and a quality diamond blade. Internal corners should be handled with care to prevent stress cracks extending beyond the […]
[…] tools and installation templates are not secondary details here. Accurate cuts, controlled openings, and correct alignment are what turn a service hatch into an integrated […]