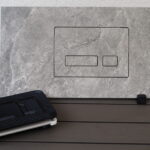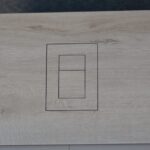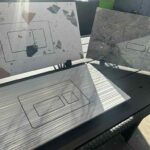
A recessed toilet paper holder or flush plate only looks effortless when the tile opening is exact. An edge cut too deep can chip the glaze, weaken a narrow strip of porcelain, or leave an uneven line that becomes visible under direct bathroom lighting. Knowing how to set tile cutting depth is therefore not just a tool setting. It is part of achieving the clean, architectural finish that built-in bathroom details demand.
The right depth depends on the tile, the cut, and the machine. There is no single setting that works for every porcelain wall tile, natural stone slab, or large-format panel. The goal is consistent: let the blade cut efficiently while keeping the tile stable, supported, and free of unnecessary stress.
Why Cutting Depth Changes the Finished Edge
A diamond blade does not simply remove material. It creates heat, vibration, and lateral force at the cut line. If too much of the blade extends below the tile, the blade can pull against the material more aggressively. That can increase vibration, cause small chips on the exit edge, and make delicate internal cuts harder to control.
Set too shallow, the blade may not fully clear the tile body. The remaining material has to be broken away, which is rarely precise on porcelain. A cut that looked clean from the face can fracture unpredictably at the back, especially around narrow openings for recessed accessories.
For a modern bathroom, this difference matters. Built-in details are defined by straight joints, even reveals, and surfaces without visual clutter. A clean tile cut allows the installed element to sit flush and intentional rather than looking like an afterthought.
How to Set Tile Cutting Depth on a Wet Saw
For most straight cuts in ceramic or porcelain tile, set the wet saw blade to extend approximately 1/8 to 1/4 inch below the underside of the tile. This is a practical starting point, not an absolute rule. Thicker material, a slightly warped tile, or a saw table with limited support may call for a small adjustment.
The blade must pass completely through the tile, but it does not need excessive exposure below it. A modest extension reduces blade deflection and helps keep the cut stable. It also limits the chance that a fragile offcut catches or drops at the end of the pass.
Before cutting finished pieces, turn off and unplug the saw, place a sample tile on the tray, and lower or raise the blade until it clears the underside by the desired amount. Check that the tile rests flat against the fence and table. If it rocks, the depth setting alone will not solve the problem – the tile needs proper support.
Use a slow, even feed rate. Forcing porcelain through the blade is a common source of chipped edges, even when the depth is correct. Let the diamond rim work. The sound should remain steady rather than strained, and water should reach both sides of the blade continuously.
For Large-Format and Thick Porcelain
Large-format porcelain is less forgiving because the piece is heavier, the cut is longer, and a small deviation can become visible across a wide surface. Keep the blade extension conservative while ensuring a full pass through the tile. Support both sides of the material so the tile cannot sag as it exits the blade.
For thick porcelain, a full-depth cut is usually appropriate, but feed pressure becomes even more important. If the blade slows, wanders, or begins to chip, do not compensate by pushing harder. Inspect the blade, confirm adequate water flow, and make sure the tile is not binding against the fence.
A sharp, quality diamond blade is as important as the depth setting. A worn or glazed blade can overheat the cut edge and chip even a perfectly aligned tile.
Depth for L-Cuts, U-Cuts, and Recessed Openings
Straight perimeter cuts are relatively simple. Openings for recessed bins, toilet brush modules, concealed paper holders, and flush plates require more control because the corners concentrate stress.
For an internal rectangular opening, avoid plunging deeply into a finished tile without first planning the sequence. Mark the cut line on the face and back of the tile. Where the saw allows a controlled plunge, set the blade only deep enough to pass through the tile body, then stop precisely at the marked corner. Overcutting beyond that point can show after installation as an unwanted cut line extending from the opening.
A common professional method is to make the main cuts from the back of the tile where possible. The blade can reach the corner without producing a visible overcut on the finished face. This requires accurate layout because the measurements are reversed. It is slower than an improvised face cut, but it produces a far cleaner result around architectural details.
For a U-cut, make the two parallel cuts first, then remove the center section with a crosscut. Do not twist the tile against a running blade to release the waste. That movement can crack a narrow bridge of material or chip the glazed face near the opening.
Corners in porcelain are particularly vulnerable. If the design permits, use a small drilled relief hole at internal corners before completing the cuts. The hole reduces stress concentration and gives the saw cut a controlled endpoint. Its size and placement should remain within the area hidden by the installed component or trim.
Score Depth on Manual Tile Cutters
Manual tile cutters work differently from wet saws. Their scoring wheel does not cut through the entire tile. It creates a controlled score line in the glazed surface, after which the breaker foot applies pressure to split the tile.
The correct score depth is light but continuous. The wheel should mark the glaze consistently without crushing the tile surface or making repeated passes. One deliberate score is better than several aggressive passes. Re-scoring can widen the line, chip the glaze, and make the break less predictable.
Adjust the scoring wheel so it contacts the tile firmly while rolling smoothly. If it skips, the wheel may be worn, the guide may be misaligned, or the tile may not be supported evenly. If the score looks excessively deep or rough, reduce pressure rather than assuming a harder pass will improve the break.
Manual cutters are excellent for clean straight cuts in suitable ceramic and porcelain tiles. They are not the right tool for every opening. Internal cutouts, narrow strips, textured surfaces, very thick porcelain, and many large-format materials are generally better handled with a wet saw or a controlled angle-grinder cut.
Common Depth Mistakes That Ruin Precise Tile Work
The first mistake is treating every material the same. A soft ceramic wall tile and a dense rectified porcelain tile can require completely different feed pressure, blade condition, and cutting sequence. Test cuts on offcuts are not wasted material. They are how you establish a reliable setting before cutting the tile that frames a visible recessed detail.
The second mistake is using depth to solve a blade problem. Lowering or raising a dull blade will not restore a clean edge. If chipping suddenly increases, inspect the blade for wear, glazing, wobble, or damage. Also check water delivery and the saw fence alignment.
The third is ignoring the direction of the cut. Many tiles chip more noticeably where the blade exits. When the exposed edge must be exceptionally clean, test the orientation of the tile and consider a shallow finishing pass. A two-pass technique – a light scoring pass followed by a full cut – can improve results on sensitive glazes, though it takes more time and requires careful alignment.
Finally, do not cut a tile opening to the exact visible dimensions of the accessory without accounting for the installation system. Recessed components need specified clearances, adhesive space, and a consistent joint around the frame. Measure the actual installation requirement, verify it against the tile layout, and dry-fit before adhesive is applied.
A Clean Cut Supports a Clean Bathroom
The blade setting may be a small adjustment, but it influences the entire visual result. Correct cutting depth protects the tile edge, makes openings more accurate, and helps recessed bathroom elements sit with the precision they were designed for. PS-Tile solutions are made to remove visual noise from the room, and the tilework around them should carry the same standard.
Take a few minutes to test the material, tune the blade depth, and confirm the layout before the final cut. That discipline is what turns a technical opening in tile into a quiet, elegant detail in the finished bathroom.