A beautiful bathroom can be undermined by a few ordinary objects left in plain view: a toilet brush beside the bowl, a trash can in the corner, spare rolls on a shelf, hooks projecting from the wall. Recessed bathroom planning addresses these details before tile is installed, placing daily essentials inside the wall instead of around the room. The result is not decoration. It is a cleaner composition, easier maintenance, and a bathroom that feels deliberately designed.
The key is timing. Recessed accessories are not finishing touches to choose after the vanity and fixtures are installed. They need to be coordinated with wall construction, plumbing, tile layout, and the way the room is actually used. Plan them early, and even a compact bathroom can gain the quiet order associated with a premium interior.
Start Recessed Bathroom Planning With Daily Use
Begin with the small routines that create visual clutter. Where does the toilet paper go? Where will a guest dispose of packaging or hygiene products? Where is the toilet brush stored after use? Which towels need to be within reach of the shower, and which should remain dry near the vanity?
A recessed solution works best when it follows the natural movement of the room. A hidden toilet paper holder belongs where the seated user can reach it comfortably, not simply where a wall cavity happens to be available. A built-in trash bin should be close to the toilet or vanity, depending on its intended use. A recessed toilet brush should be discreet but immediately accessible, without occupying the floor beside the toilet.
This is where minimalism becomes practical. Removing freestanding accessories creates more visual space, but it also removes awkward areas around their bases where dust and moisture collect. The floor stays clearer, cleaning is faster, and every function has a defined place.
Decide What Deserves a Place Inside the Wall
Not every bathroom accessory needs to be recessed. The strongest designs use built-in elements selectively, concentrating on items that are used every day and tend to interrupt clean lines.
A recessed toilet brush is an especially effective choice in a modern toilet area. It keeps the brush enclosed, reduces visual distraction, and avoids a separate container on the floor. A built-in waste bin delivers the same advantage: waste is contained, the room appears more organized, and the tile surface remains the dominant visual element.
Hidden toilet paper storage is valuable in smaller rooms, where a standard wall-mounted holder can protrude into a narrow passage. Recessed towel hooks are equally useful near showers and bathtubs. When they sit flush or nearly flush with the tile surface, they preserve a clean wall plane while providing a practical point for a hand towel or bath towel.
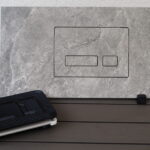
Recessed flush plates can also support a more architectural result. Rather than adding another projecting control to the wall, the flush actuation becomes an integrated detail within the concealed cistern system. The best choice depends on the compatible installation system, the wall build-up, and the desired tile finish.
Plan Function Before Symmetry
Perfect alignment is satisfying, but usability comes first. A niche centered precisely on a wall may look balanced in an elevation drawing, yet be inconvenient once the toilet, door swing, or vanity is in place. Establish practical heights and reach zones first. Then refine the composition around them.
This is particularly relevant when several recessed elements share one wall. A concealed toilet paper holder, brush module, and waste bin can form a clean vertical arrangement, but only if their openings remain comfortable to use and do not compete with the flush plate or wall-hung toilet frame.
Coordinate the Wall, Plumbing, and Tile Layout
The wall cavity is the technical foundation of every recessed detail. Before choosing a component, verify the available depth, stud or framing positions, plumbing routes, electrical wiring, insulation requirements, and any structural constraints. A shallow partition may suit a small recessed holder but not a deeper waste bin. A masonry wall may require a different preparation than a framed service wall.
The important question is not simply, “Will it fit?” It is, “Can it be installed accurately without compromising the wall or future access?” A professional installation accounts for waterproofing where needed, stable fixing points, tile thickness, adhesive depth, and the final finished plane.
Tile layout deserves the same attention. A recessed accessory should look integrated with the tile grid, not cut into it as an afterthought. Align visible edges with grout lines where possible, or position the frame so that tile cuts are balanced and intentional. Large-format tile can create a particularly elegant surface, but it demands accurate measurements and careful cutting around openings.
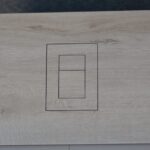
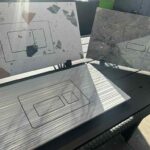
Templates and dedicated cutting tools are not minor extras in this process. They help installers create clean, repeatable openings for compatible concealed systems and maintain the precision that a flush-mounted detail requires. A millimeter of inaccuracy can be visible once the surrounding tile is set.
Allow for the Finished Surface
Measurements should always be based on the final wall plane, not only the unfinished substrate. Tile thickness varies, and so do adhesive beds, waterproofing layers, and panel systems. If the installation depth is calculated too early or too loosely, a component may end up sitting proud of the tile or recessed too far behind it.
The intended finish matters as well. A matte porcelain tile, stone-look slab, microcement surface, or thin ceramic tile may each require a different approach to edge detailing. The goal remains the same: a clean reveal, stable integration, and no improvised trim trying to hide an inaccurate opening.
Design for Cleaning and Service Access
A concealed element should simplify the bathroom, not create a maintenance problem. Choose designs with surfaces that can be wiped easily and containers or functional parts that can be removed when necessary. For waste bins and toilet brush units, hygiene depends on simple access for emptying and cleaning, even when the exterior remains discreet.
Service access also matters around concealed cisterns and flush mechanisms. The flush plate area commonly serves as the access point for internal maintenance, so its placement and compatibility must be resolved before tiling. Do not let a decorative decision block a necessary technical function.
This is one of the main trade-offs in recessed bathroom planning. A fully integrated look requires more coordination during construction than a freestanding accessory purchased later. In return, the room gains long-term order and fewer objects competing for attention. For a guest powder room or a compact primary bathroom, that difference is often immediately noticeable.
Use Recessed Details to Make Small Bathrooms Feel Larger
In a limited footprint, every projection matters. A trash can, brush holder, and oversized paper holder may only consume a few inches each, but together they make a narrow toilet room feel crowded. Recessing selected functions restores clear floor space and lets the eye travel across uninterrupted tile.
That does not mean every wall should be filled with openings. Too many niches can fragment the surface and weaken the calm effect you are trying to create. Use built-in accessories where they solve a real need, then leave enough uninterrupted wall area for the tile, lighting, and sanitary fixtures to carry the design.
For larger bathrooms, recessed details bring a different benefit: discipline. A spacious room can still feel untidy when everyday objects are scattered around it. Integrated storage and accessories preserve the luxurious, hotel-like quality of a well-composed bathroom without sacrificing convenience.
A Practical Sequence for the Build
The most reliable projects follow a clear order. First, define the room layout and the daily-use zones. Next, select the recessed components and confirm their dimensions, opening requirements, and system compatibility. Then coordinate framing, plumbing, and electrical work before waterproofing and tile installation begin.
Before the installer cuts the final openings, review the tile layout against the exact component positions. Confirm finished-wall depth, clearances, and access for removable parts. This short coordination step prevents the expensive kind of compromise: a beautiful tile wall interrupted by an awkward cut, a misaligned frame, or an accessory installed where it cannot be used comfortably.
For architects, designers, and installers, this is where specialized recessed components and precise installation tools earn their place. PS-Tile focuses on the details that turn a technical cavity into an elegant, functional part of the finished interior.
A bathroom feels genuinely refined when nothing appears accidental. Plan the objects that usually create clutter before the walls close, and the finished space will remain calm, hygienic, and visually clean long after the renovation is complete.