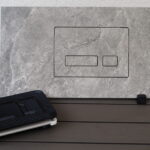
A perfectly aligned recessed accessory can lose its refined effect because of one chipped hole in the tile. Porcelain drill bits are the detail that protects the finish when a bathroom installation requires openings for a towel hook, cover plate, control, or precisely fitted built-in component. The right bit, speed, and cooling method turn a difficult cut into a clean architectural detail.
Porcelain tile is selected for its density, low water absorption, durability, and elegant surface. Those same qualities make it far less forgiving than standard ceramic tile. A conventional masonry bit may mark the glaze, overheat, wander across the surface, or crack the tile close to the final stage. For a bathroom designed without visual clutter, that is a risk worth avoiding.
Why porcelain requires a different drilling approach
Porcelain is fired at very high temperatures and has a compact, hard body. It is not simply a ceramic tile with a tougher surface. A drill bit must cut through a dense material rather than fracture its way through it. This is why diamond cutting edges are the professional standard for holes in porcelain.
The goal is controlled abrasion. Diamond particles on the cutting edge gradually remove material while water limits heat and carries dust away from the cut. Excess pressure does not make the process faster. It creates heat, wears the bit prematurely, and can transfer stress into the tile or the adhesive bed behind it.
This matters most in bathrooms with large-format porcelain. Large tiles create calm, continuous planes with fewer grout lines, but their value is immediately visible. A misplaced or chipped opening can interrupt an otherwise clean wall composition. Before drilling, confirm the exact center point, the finished location of the fitting, and whether a joint or an edge offers a better placement.
Choosing porcelain drill bits for the opening
The correct diameter should match the fixing, pipe, cable, or hardware that will pass through the tile. Do not make an oversized opening merely to make installation easier. A hole that is too large may remain visible around a cover plate, reduce support for a fitting, or weaken the visual precision of the detail.
Diamond core bits for clean circular holes
Diamond core bits are the preferred choice for most porcelain tile openings. Their hollow, cylindrical form cuts a circular kerf instead of grinding away the entire center of the hole. This makes them effective for medium and larger diameters, including holes for plumbing penetrations, electrical boxes, and mounting points that need a clean perimeter.
A vacuum-brazed diamond core bit usually offers strong cutting performance and a durable diamond layer. Electroplated diamond bits can also produce neat results, particularly for lighter work, but their service life is generally shorter. The better choice depends on the number of holes, tile thickness, and hardness of the selected porcelain.
For a single small opening, a high-quality diamond bit may be all that is required. For repeated work across an entire project, professional-grade core bits are the more economical option because they maintain their cutting behavior longer and produce more consistent edges.
Small holes and mounting points
Small-diameter holes for screws and anchors require particular care. Spear-point tile bits can be used on some ceramic surfaces, but dense porcelain quickly exposes their limitations. Diamond drill bits designed for small holes offer more dependable results where accuracy matters.
Choose the hole size based on the fastener system, not the screw alone. The tile hole must allow the anchor or fixing method to work correctly in the substrate behind the tile. In a finished bathroom wall, the structural hold should come from the approved backing, stud, masonry, or installation frame, not from porcelain itself.
Dry drilling or wet drilling
Both methods have a place. Wet drilling is the safer choice for many porcelain applications because continuous water cooling reduces friction and helps preserve the bit. It is especially suitable for large holes, thick porcelain, and repeated drilling.
Dry diamond core bits are convenient when water containment is impractical or when work is limited to a few holes. They need a bit designed specifically for dry use and short, controlled drilling intervals. If the cutting edge turns excessively hot or the tile begins to discolor, stop immediately and allow the bit to cool. Do not cool a hot bit by plunging it into cold water, as sudden temperature change can damage it.
How to drill porcelain tile without chipping it
A clean hole begins before the drill is switched on. Measure from fixed reference lines rather than estimating from the edge of a tile. In a minimalist bathroom, even a small offset is noticeable when fittings align with grout joints, recessed niches, or flush-mounted accessories.
Use a pencil or suitable marker to identify the center point. A strip of masking tape can improve visibility and reduce initial slipping, although it is not a substitute for a guide. For the most accurate start, use a drilling template, guide plate, or vacuum guide that holds the core bit in position until the cutting edge has formed a shallow groove.
Set the drill to rotary mode only. Hammer action is for masonry and should never be used to drill porcelain. Begin at low speed with minimal pressure. When using a core bit without a guide, start it at a slight angle so one edge contacts the surface first. Once a shallow crescent groove is established, gradually bring the drill upright. This reduces wandering and protects the finished face of the tile.
Keep the drill stable and let the diamond edge work. The sound should remain even rather than harsh or high-pitched. A sudden change in sound often signals that the bit is overheating, binding, or reaching a void behind the tile. Pause regularly during dry drilling. During wet drilling, maintain a controlled supply of water at the cutting area without flooding the work zone.
As the bit approaches the back of the tile, reduce pressure further. Breakthrough is a common point for chips because the remaining material is thin. If the tile is already installed, be aware of the substrate, waterproofing layer, concealed pipes, and electrical routes before continuing beyond the tile. The drilling method after the porcelain layer must match the wall construction.
The details that preserve a premium result
Porcelain drilling is not only about making a hole. It is about protecting the system around it. A clean tile opening still needs the correct seal, anchor, and finishing component to remain functional in a wet room.
In shower zones and other areas exposed to water, follow the waterproofing system requirements for penetrations. Use compatible sealing elements where required and avoid leaving an unprotected gap behind a fitting. Silicone alone is not a replacement for correctly planned waterproofing.
The location of the hole also matters. Avoid drilling too close to a tile edge whenever possible. Edges and narrow tile strips are more vulnerable to cracking, especially if the substrate is uneven or the tile has not been fully supported with adhesive. If a mounting point must sit near an edge, a carefully planned tile layout may be a better solution than forcing the hardware location after installation.
For recessed bathroom accessories, coordinate all openings before the wall is closed or tiled. Templates, installation dimensions, and finished tile thickness should be confirmed early. This is how built-in details remain flush, elegant, and free from improvised adjustments at the final stage. At PS-Tile, this precision is central to the visual value of concealed bathroom solutions: the technical work should disappear, leaving only clean lines and function.
Common mistakes that shorten bit life
The most frequent mistake is treating porcelain like ordinary wall tile. High speed, hammer mode, and strong pressure are not signs of efficient drilling. They are usually the reason a bit burns out or a tile chips.
Another issue is drilling with a dull bit because it appears to still be cutting. A worn diamond edge generates more heat and requires more pressure, which raises the risk of damage. Replace or recondition the bit when cutting becomes slow, inconsistent, or visibly overheated.
It is also easy to overlook dust and slurry. Remove buildup during the process, particularly with wet drilling. A clogged cutting edge stops abrading efficiently and begins polishing the porcelain instead. The result is heat without progress.
A quiet, precise hole is a small part of the installation, but it has a lasting effect on the finished room. Choose porcelain drill bits that suit the tile and the task, work with measured control, and let every visible fitting sit exactly where the design intended.