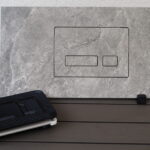
A tiled wall can be perfectly level, beautifully selected, and precisely grouted, yet still look unfinished at an exposed corner. To install tile edge profiles correctly is to give that edge a deliberate architectural finish: straight, durable, easy to clean, and free from the visual noise of chipped tile corners or bulky trim.
For modern bathrooms, tile profiles are not an afterthought. They define niches, shower returns, half walls, vanity backsplashes, and outside corners with a clean line that supports the entire design. The difference is subtle at first glance. In daily use, it is unmistakable.
Choose the Profile Before You Set Tile
The profile must match the tile thickness, not the nominal size printed on the box. Measure the tile itself and include the adhesive bed you expect behind it. A profile that is too shallow leaves the tile edge proud of the trim, where it can catch dirt and feel sharp. A profile that is too deep creates a recessed channel that interrupts an otherwise clean surface.
As a practical rule, select a profile depth equal to the tile thickness or slightly greater. Large-format porcelain, handmade tile, natural stone, and mosaic sheets can vary significantly. Check several tiles, especially when working with textured, rectified, or uneven materials.
Material also affects the final result. Aluminum profiles offer a refined, contemporary line and suit most dry or moderately wet bathroom zones. Stainless steel is a stronger choice where impact resistance and long-term durability matter most, such as busy shower areas or commercial interiors. PVC profiles can be cost-effective, but their visual character is usually less premium and they are less suitable for an architectural bathroom where every visible detail is intentional.
The shape should follow the room’s language. Square-edge profiles create a crisp, minimal finish that works with linear fixtures and recessed accessories. Rounded profiles soften an outside corner and can be practical in family bathrooms. A narrow, discreet profile often looks more luxurious than a wide decorative strip, particularly beside large-format tile.
Plan Every Visible Edge
Before mixing thinset mortar, map the tile layout and mark every exposed edge. This includes outside corners, wall returns, recessed niches, shower benches, half walls, windows, and transitions where tile ends against painted drywall.
Do not decide the profile position only after setting the first row. A profile can force a narrow tile cut at the opposite end of a wall, shift a grout joint away from the centerline, or create an awkward interruption around a recessed toilet paper holder or built-in bathroom accessory. The cleanest work begins with a full layout, including grout-joint widths and the placement of all built-in elements.
Whenever possible, align the profile with the tile grid. On a niche, for example, the top and side profiles should frame the opening as one precise composition, not look like separate pieces added during installation. If the design uses a vertical stack bond, carry that geometry through the returns and profile lines.
Dry-fit the profile with tiles before committing. This step reveals whether the trim sits flush, whether the corner joint will close neatly, and whether the visual width works with the grout lines. It is much easier to adjust a layout on a dry surface than after mortar has begun to cure.
How to Install Tile Edge Profiles at Outside Corners
Start with a flat, stable substrate. Cement board, waterproof foam board, or a properly prepared masonry wall must be plumb and smooth. Tile profiles cannot correct a crooked wall. In fact, a straight metal edge will make uneven preparation more visible.
Apply thinset mortar to the wall with the correct notched trowel for the tile format. Press the perforated anchoring leg of the profile into the fresh mortar, keeping its visible edge exactly where the finished tile edge will land. The profile must be fully supported along its length, with mortar worked through the perforations.
Set the first tile against the profile, using the same grout spacing you use between tiles. Do not butt tile tightly against the metal. A small, consistent joint allows grout to finish the transition cleanly and accommodates minor movement. The exact gap depends on the tile and grout specification, but it should visually match the rest of the installation.
Check the profile with a level or straightedge as you work. A profile that is off by even a small amount can be obvious because it creates a continuous reference line. For tall shower walls, verify plumb at several points rather than relying only on the first few inches.
Then set the tile on the adjoining face of the corner. Use spacers, leveling clips where appropriate, and frequent visual checks to keep both planes aligned. The goal is not merely to cover the anchoring leg. The goal is to create a precise corner where the profile and tile read as one finished surface.
Avoid forcing the profile into place after surrounding tile has already begun to set. This often produces voids under the anchoring leg, uneven tile edges, or a wavy line. Profiles belong in fresh mortar, installed as part of the tile assembly.
Cut Profiles With the Same Precision as Tile
Measure profile lengths from finished intersection to finished intersection, not from rough wall to wall. Account for corner pieces, end caps, and miters before cutting. For a simple termination at a wall or floor, a clean square cut may be enough. For a visible outside corner around a niche or wall return, a 45-degree miter usually gives a more elegant result.
Use a fine-tooth saw blade or a cutting tool suited to the profile material. Cut slowly to avoid crushing, overheating, or leaving a rough burr. File or deburr the cut edge if needed. A sharp metal edge is both unsafe and visually careless in a premium bathroom.
Pre-made corners can save time and produce consistent geometry, especially on rounded profiles. Miters, however, often look more discreet on square profiles and large-format installations. The best option depends on the profile system, the visibility of the corner, and the skill required to execute it accurately.
Details That Protect the Finish
Profiles are durable, but they are not indestructible. Keep abrasive tools away from visible surfaces, especially polished stainless steel and anodized aluminum. Wipe off mortar immediately before it hardens. Once thinset or grout cures in the profile’s edges, removal can damage the finish or leave marks that catch the light.
In wet zones, waterproofing comes before the profile. The trim is a finishing component, not a substitute for a waterproof membrane, properly sealed corners, or correct shower construction. At changes of plane, such as wall-to-wall and wall-to-floor joints, use a flexible sealant where the installation system calls for it rather than rigid grout. This small decision reduces the risk of cracking as materials move independently.
Grout the tile-profile joint carefully. Pack the joint fully, then clean the metal edge with a soft sponge and clean water. Do not leave a thick grout smear across the face of the profile. The profile should remain a deliberate line, not disappear under residue.
Common Mistakes That Ruin a Clean Edge
The most frequent problem is choosing trim by appearance alone and ignoring depth. Even a beautiful finish looks wrong if the tile stands higher than the profile or sinks too far below it. Another common error is cutting profiles without planning the sequence of corners, which leads to mismatched miters or an exposed cut at the most visible point.
Installers also sometimes use a profile to hide an uneven tile cut. It may conceal the cut, but it will not fix a poor layout or an out-of-plumb substrate. The best profile installations are supported by accurate cuts, consistent joints, and a wall surface prepared for precision.
Finally, do not overload a minimalist bathroom with unnecessary trim. A profile has the strongest effect when it solves a real edge condition. Used selectively around a shower niche, tiled return, or exposed half wall, it delivers structure without becoming a decorative distraction.
A Clean Edge Supports the Whole Bathroom
Tile edge profiles are small components with an outsized effect on how a bathroom feels. They protect vulnerable corners, simplify cleaning, and replace fragile exposed tile edges with a crisp finish that holds up to daily use. More importantly, they preserve the visual calm of a room designed without clutter or compromise.
Treat every exposed tile edge as part of the architecture. When the profile depth, finish, layout, and installation are handled with care, the result is not simply a finished corner. It is a bathroom where every line looks intentional.