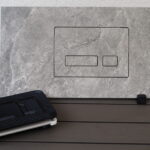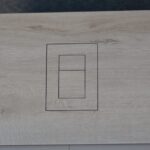
A recessed toilet brush, concealed paper holder, or tile-in flush plate only looks effortless when the tile lands exactly where the hardware expects it. Selecting tile thickness for hardware is therefore not a minor ordering detail. It determines whether the finished surface is clean and flush or whether a carefully planned wall ends up with proud edges, deep reveals, and visible compromises.
In a premium bathroom, built-in accessories should disappear into the composition of the wall. Their function remains accessible, while the visual noise of brackets, gaps, and mismatched levels is removed. That result begins before tile is cut – with the true finished thickness of the wall assembly.
Selecting Tile Thickness for Hardware Before You Order
Do not work from the thickness printed on the tile box alone. A tile described as 3/8 inch thick may vary slightly from piece to piece, and the wall surface is never defined by tile alone. The final dimension includes the tile, adhesive mortar, and any required waterproofing or leveling layer behind it.
For recessed hardware, the relevant measurement is the distance from the finished wall face back to the installation plane of the component. This is the dimension that decides whether a tile-in cover sits flush, whether an opening aligns with the frame, and whether a moving part can operate freely.
Measure the tile with calipers when possible, especially with large-format porcelain, natural stone, handmade tile, or thick decorative surfaces. Then discuss the expected mortar bed with the installer. Large-format tile, uneven substrates, and walls that need correction can all increase the adhesive thickness. A nominal tile measurement is useful for early planning; a sample mounted on the intended substrate is more reliable for final decisions.
Tile thickness is only one layer of the wall
A common mistake is to treat a 10 mm tile as a 10 mm finished surface. In reality, the adhesive layer may add several millimeters, and waterproofing systems can affect the build-up as well. The exact result depends on the substrate, trowel size, tile format, flatness of the wall, and installation method.
This does not mean every installation needs excessive calculation. It means the hardware should be selected and positioned around the finished build-up, not around an assumption. When the accessory has an adjustable depth or a trim system designed for a range of tile thicknesses, that range still needs to be verified against the actual assembly.
Natural stone deserves particular attention. Stone can vary within the same batch, and honed, textured, or split-face surfaces do not behave like perfectly calibrated porcelain. If the visible face is irregular, decide which plane should read as flush: the highest points, the average surface, or a deliberately recessed detail. The answer affects both appearance and cleaning.
The Flush Detail That Defines the Finished Wall
Built-in bathroom hardware is judged at the edge. A difference of only a few millimeters can be visible when light falls across a large-format tile or a dark grout line. The cleaner the bathroom design, the more obvious an inaccurate reveal becomes.
When a tile-in element is set too deep, it can create a shadow line that looks accidental and collects dust or moisture. When it sits too far forward, it interrupts the wall plane and can catch on towels, clothing, or cleaning cloths. Neither outcome matches a bathroom designed for calm, elegant function.
The desired finish depends on the component. A tile-in flush plate may be intended to align tightly with the tile face. A recessed toilet paper holder may use a precise frame or controlled reveal that is part of its design. A hidden towel hook must still project enough to be usable, while its mounting remains discreet. Do not assume every product should be installed at exactly the same depth.
Read the product’s installation drawing as a finished-surface instruction, not simply as a rough-in diagram. Identify the reference point: is the stated depth measured from framing, backer board, waterproofed surface, or completed tile face? This single distinction prevents many costly corrections.
Match the Hardware to the Tile, Not the Other Way Around
The tile is usually selected for its color, texture, format, and role in the interior. Hardware should support that decision. The best approach is to choose the tile early, then select recessed components with the correct adjustment range and installation logic.
Thin porcelain mosaics, standard wall tile, and 20 mm stone slabs do not place the finished face in the same location. If the bathroom uses more than one surface thickness, each wall requires separate attention. A niche wall finished in thin mosaic may need a different setting than a toilet wall clad in large-format porcelain.
This matters particularly when one continuous visual line crosses several functions. For example, a concealed paper holder beside a wall-hung toilet and a tile-in flush plate above it should relate to the same finished plane. If one component was planned around a 1/4 inch mosaic and another around a 1/2 inch porcelain panel, the inconsistency may be visible even before the room is furnished.
At PS-Tile, the purpose of integrated accessories is not merely to place an object inside the wall. It is to preserve the wall as a clean architectural surface, with function present only where it is needed. Tile thickness is part of that precision.
Plan the Installation Sequence With Your Tile Setter
The person selecting the hardware, the installer building the wall, and the tile setter should agree on the finished dimensions before the substrate is closed. This is especially valuable on projects with concealed cisterns, waterproofed shower walls, or custom stone fabrication.
Start with the physical tile sample, not a product photo or a catalog number. Confirm its actual thickness and whether it will be installed with a typical mortar bed or a more substantial build-up. Next, mark the planned finished tile face on the wall. The hardware can then be set relative to that line.
Before tiling begins, dry-fit the component and inspect its cover, door, plate, or insert. Check clearances for operation, opening direction, and removal for cleaning or service. A recessed waste bin, for instance, needs more than a visually correct front edge. Its internal container must still slide out easily after the surrounding tile is in place.
If the project includes a Geberit or Grohe concealed system, use the correct template and verify it against the selected plate and tile build-up. Templates improve cutting accuracy, but they do not replace a final check of surface depth. Precision tools and clean cuts matter because an oversized opening cannot be hidden by a minimal trim detail.
Leave room for real-world tolerances
Even a disciplined installation includes tolerances. Walls may not be perfectly flat, tiles can differ slightly in thickness, and grout joints influence how an opening is perceived. Plan for adjustment where the hardware permits it, but do not use adjustment as a substitute for correct rough-in placement.
Avoid forcing a flush result with excessive grout or thick silicone. These quick fixes tend to discolor, crack, or look visually heavy against a refined tile surface. A narrow, consistent joint is more durable and more elegant than an improvised filler line.
If the tile is exceptionally thick, ask whether the selected built-in hardware is designed for that range. If it is exceptionally thin, confirm that the finished cover or trim will not sit recessed. There is no universal tile thickness that suits every component. Compatibility is always product-specific.
Common Mistakes That Disturb a Clean Result
The most expensive errors are usually made before the first tile is installed. Ordering hardware without confirming its finished-depth range is one. Another is measuring only one sample tile and overlooking a thick textured face or a different tile used on an adjacent wall.
It is also risky to assume that a deeper recess is harmless because it can be filled later. Deepening a built-in component may affect access, moving mechanisms, and the visual proportion of the opening. Similarly, pushing a unit forward after waterproofing can compromise the intended installation plane or create difficult transitions around the frame.
Finally, avoid treating grout width as an afterthought. A 1/16 inch joint and a 3/16 inch joint create very different visual spacing around tile-in hardware. Establish the joint layout before cutting. Centering an opening, aligning it with tile edges, or continuing grout lines across the wall can make the difference between a technical insertion and an intentional design detail.
A Better Standard for Built-In Bathroom Details
Selecting tile thickness for hardware is a decision about more than millimeters. It protects the quiet quality of the bathroom: flush surfaces, easy cleaning, reliable operation, and no unnecessary visual interruption. Confirm the full wall build-up, set components from the finished face, and let the tile layout guide every cut.
When the depth is planned with the same care as the fixture and finish, a concealed accessory does what it should: it serves the room without competing with it.