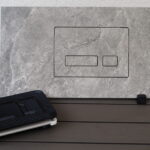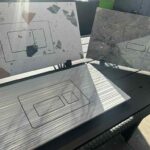
A bathroom can have premium tile, refined fixtures, and carefully planned lighting, yet still lose its architectural clarity because of one visible plastic hatch. This concealed access panel guide explains how to keep essential service points reachable while preserving a clean, elegant wall surface. The goal is not to hide technology completely. It is to give it a precise, discreet place behind the same finish that defines the room.
A concealed panel is especially valuable in bathrooms where every detail is intentional. It removes a visually disruptive access door from the wall, protects the continuous rhythm of the tile, and keeps maintenance access available for the components that will eventually require attention.
What a concealed access panel does
A concealed access panel is a service opening integrated into a tiled wall, ceiling, or boxed-out installation. Its visible face is finished with the same tile as the surrounding surface, so the access point becomes nearly invisible when closed. Instead of a contrasting metal or plastic frame, the eye sees a continuous tile layout and narrow, controlled joints.
The panel provides access to concealed plumbing and technical components without forcing future repairs to begin with demolition. In a modern bathroom, that may mean access to shutoff valves, a flush tank service opening, water meters, manifolds, filters, traps, or electrical controls approved for the specific location.
This is a practical detail, not only a decorative one. A tile-ready panel allows the wall to look calm and finished while retaining the functionality a plumber, installer, or homeowner needs later.
Where concealed access matters most
The best location depends on the technical layout behind the wall. Planning the access point after tile installation is already underway usually means compromise. Plan it when the wall frame, plumbing routes, and fixture locations are visible.
Behind a wall-hung toilet
A concealed cistern already has a service opening behind the flush plate. However, the surrounding installation wall can also contain shutoff valves, water connections, or other components that need separate access. If the flush plate opening is too small for the work required, an additional tile-integrated access panel can prevent unnecessary removal of finished surfaces.
The panel should never interfere with the carrier frame, flush plate mechanism, or service procedures specified by the cistern manufacturer. Compatibility comes first. A clean result is only valuable when every component remains correctly accessible.
Near shower valves and water controls
Shower mixers, thermostatic valves, body sprays, and concealed pipe connections are often located inside partition walls. Some installations can be serviced from the front through trim components, while others need rear access from an adjacent room, closet, or technical wall.
Where rear access is necessary, a concealed panel in the adjacent tiled surface or a coordinated wall finish can be the cleaner solution. Do not assume every valve needs an access panel directly behind it. Follow the fixture manufacturer’s service requirements and the plumbing plan.
In utility zones and built-in niches
Concealed panels are useful around manifolds, water filters, drain cleanouts, ventilation controls, and concealed electrical equipment where code permits. They are also effective in large-format tiled walls that conceal a service shaft or a boxed-out installation zone.
For a guest bathroom, a panel can keep service access out of sight. In a primary bath, it protects the minimalist visual standard expected from a premium interior. The principle is the same: technical access should be present, but it should not become the focal point of the room.
Choosing the right panel size
The smallest possible opening is not always the best choice. An access panel must be large enough for real maintenance, not merely large enough to show that a valve exists. Consider the hand space needed to turn a shutoff valve, remove a filter cartridge, inspect a connection, or replace a component.
Start with the manufacturer’s recommended service clearance. Then account for the panel’s opening method, the depth of the wall cavity, and the size of the tile that will cover the door. A panel that looks discreet but cannot accommodate a repair creates a costly problem later.
Large-format tile introduces another consideration. A panel can often be aligned to a single tile, producing an exceptionally clean result. But a very large tile may be heavy, and the panel hardware must be rated to carry that finished weight safely. Small mosaic tile can also be used, although the joint pattern may make the panel outline more visible.
Concealed access panel guide: details that determine the result
A hidden panel only looks premium when it is planned as part of the tile composition. The opening should align with grout joints whenever possible. Random cuts around the perimeter make even a well-made panel look improvised.
First, establish the finished tile grid. Decide whether the panel will use one full tile, a group of tiles, or a purpose-cut piece. Then position the opening so its joints continue naturally into the surrounding wall. This is especially important with marble-look porcelain, veined stone, concrete-look slabs, and rectified large-format tile. Vein direction, pattern repeat, and grout line placement all affect whether the panel disappears visually.
The reveal around the panel must be even. An inconsistent gap draws attention immediately, particularly under side lighting. Use a system designed for tile applications rather than adapting a generic utility hatch. The frame, hinges or removable fixing method, and tile support all need to manage the weight and thickness of the finish.
Opening hardware also deserves attention. Push-to-open systems create the cleanest face because there is no visible handle. They work well when the panel is correctly aligned and the tiled door is within the hardware’s weight limit. In other situations, a removable panel with concealed retention may be more practical, especially for larger openings or service areas where full clearance is needed.
Moisture, waterproofing, and wall construction
A concealed access panel is not a substitute for waterproofing. In shower areas and other wet zones, the waterproofing system must remain continuous and correctly detailed around the opening. This is the point where product selection and installer experience matter most.
Some access locations are better placed outside the direct wet area, even if that means using an adjacent wall. A panel behind a shower control may be easier and safer to service from a hallway, closet, or dry-side partition. This approach protects the visual simplicity of the shower while reducing waterproofing complexity.
If an opening must be located in a tiled wet wall, use a system intended for that environment and follow the waterproofing membrane manufacturer’s instructions. Pay attention to corner transitions, frame interfaces, sealant joints, and movement allowances. A beautiful tiled panel is not successful if moisture can enter the wall cavity.
Wall construction matters as well. The substrate must be stable enough to support the frame and prevent movement when the panel opens. Cement board, tile backer systems, metal stud walls, masonry, and custom installation walls each require an appropriate fixing strategy. The frame should be level, square, and securely anchored before tile work begins.
The installation sequence professionals follow
The cleanest installations begin with coordination, not cutting. The plumber identifies the components that need future access. The designer or architect establishes the visual layout. The installer confirms that the panel fits the wall construction and tile format. When these decisions happen together, the final result looks deliberate rather than technical.
Before tiling, verify the rough opening dimensions, frame depth, tile thickness, adhesive build-up, and clearance for opening. Dry-fit the panel and test it before the tile is installed. It is much easier to correct alignment at this stage than after grout has cured.
When applying tile to the panel, maintain the same joint width and pattern as the wall. Avoid loading adhesive unevenly, which can twist the door or make it sit proud of the surrounding tile. After grouting, test the panel again. It should open without chipping tile edges, rubbing on the frame, or disturbing nearby grout.
Precision tools and installation templates are not secondary details here. Accurate cuts, controlled openings, and correct alignment are what turn a service hatch into an integrated architectural element. This is the same standard that applies to recessed toilet paper holders, built-in toilet brushes, and flush-mounted waste bins: the technical function should support the design, not interrupt it.
Common mistakes to avoid
The most common mistake is placing the panel where it is convenient during framing but awkward for future service. A narrow opening behind a fixture, a door that cannot open fully, or an access point blocked by cabinetry defeats its purpose.
Another mistake is treating the panel as an afterthought in the tile layout. If joints do not align, if a stone pattern breaks abruptly, or if the door sits unevenly, the access point becomes more visible than a conventional hatch.
Finally, do not overspecify concealment at the expense of service. A panel should be discreet, but it must remain easy to identify for the person maintaining the system. Keep relevant documentation with the home records, including the panel location, opening method, and the equipment behind it.
A well-planned concealed panel gives a bathroom something more valuable than an uninterrupted wall: confidence that the space can be maintained without sacrificing its clean, luxurious character.