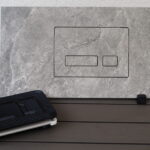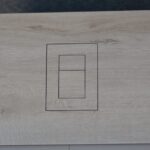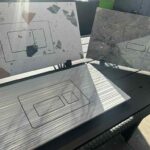
A floor-standing toilet brush is a small object with an outsized effect on a finished bathroom. It occupies visual space, collects dust around its base, and interrupts an otherwise clean wall line. To install recessed toilet brush hardware is to remove that compromise at the source: the brush, holder, and drip area sit within the wall, while the visible finish aligns precisely with the tile.
This is not an accessory to decide on after the bathroom is complete. A recessed toilet brush needs to be planned with the wall assembly, waterproofing system, tile layout, and final toilet position. When those details are coordinated early, the result feels quiet, elegant, and intentional – a functional necessity without a distracting object on the floor.
Choose the location before the wall is closed
The best location is close enough to the toilet for comfortable use but far enough away that the handle can be removed without hitting the toilet, a vanity, or a door. In most layouts, the side wall beside the toilet is the natural choice. A rear wall can also work, provided the brush is accessible without reaching awkwardly over the fixture.
Before selecting the exact height, hold a sample brush or use the product dimensions to check the motion of lifting it out and returning it to its holder. The opening must remain practical for daily use, not only look centered in an elevation drawing. Consider the toilet paper holder, flush plate, grab bar, electrical controls, and any niches in the same area. Minimalism depends on proper spacing. When several details compete for one small wall, the room quickly loses its calm appearance.
The wall cavity is equally important. Confirm the available depth, stud positions, plumbing routes, electrical wiring, and the toilet carrier or in-wall cistern. Never cut a recess into a wall simply because the visible location looks ideal. The concealed structure determines what is possible.
Plan the recessed toilet brush around the tile layout
A clean installation begins with a tile module, not a saw cut. Establish the finished tile grid first, including grout-joint width and the starting point of the layout. Then position the recessed frame so its edges align with full tiles, symmetrical cuts, or deliberate grout-joint lines.
A frame centered randomly across multiple tiles can make even an expensive bathroom look improvised. Small perimeter cuts are especially noticeable around a precisely made metal component. Where possible, place the opening within a full tile field or arrange the surrounding cuts to mirror one another.
This is also the moment to decide how the finish should read. A tile-insert door or cover can nearly disappear into the wall, creating the most architectural result. A visible stainless steel or coated metal frame creates a controlled contrast and may suit bathrooms with matching faucets, flush plates, or hardware. Neither choice is universally better. The right option depends on whether the design calls for the accessory to recede completely or act as a refined detail.
For large-format porcelain, measure carefully before cutting. A small error is difficult to disguise, especially with narrow joints and rectified edges. Templates and accurate cutting tools are not extras in this type of work. They are what protect the finished line.
Prepare a stable, serviceable wall opening
Once the location is approved, build a rigid opening to the manufacturer’s specified dimensions. Frame the cavity as needed so the recessed body is supported on all sides. Do not rely on tile, adhesive, or cement board alone to carry the component or correct an uneven wall opening.
Check the unit for plumb, level, and flush placement relative to the future finished tile surface. This final plane matters more than the rough wall face. Account for the thickness of backer board, waterproofing membrane, thinset, and tile. A body set too deep creates an awkward reveal; one that projects too far can prevent the cover or trim from sitting correctly.
A recessed toilet brush should also remain removable for cleaning and replacement. Follow the product’s access requirements and avoid burying fasteners or removable liners behind tile. The visible result may be discreet, but the interior should remain practical. Good bathroom design hides visual clutter, not necessary maintenance.
Waterproof the recess as part of the shower-room system
A toilet area is not exposed to the same direct water as a shower wall, but it is still a wet-cleaned, high-use zone. The recess interrupts the wall surface, so waterproofing must be returned cleanly into the opening and integrated with the component’s approved installation method.
Use the same compatible waterproofing system specified for the wall assembly. Treat corners, transitions, fastener penetrations, and the perimeter of the recess with particular care. Do not assume that a bead of sealant at the front edge replaces a proper waterproofing connection behind the tile. Sealant is a finish joint, not the primary defense against moisture entering the wall.
The exact method varies by product construction. Some recessed units incorporate a flange designed to work with a membrane; others require a specific sealing band, adhesive, or gasket. Read the installation instructions before waterproofing begins, not after the tile is installed. If the brush holder includes a removable insert or drain feature, verify its orientation so any moisture is controlled rather than trapped.
For projects with a tiled wall-mounted toilet carrier, coordinate this work with the installer responsible for the carrier and flush system. The brush recess must not compromise access panels, load-bearing elements, or service zones.
How to install recessed toilet brush hardware accurately
With the wall prepared and waterproofed, the visible installation becomes a precision exercise. Dry-fit the frame or body first. Confirm the opening dimensions, surrounding tile cuts, lid movement, and alignment with grout joints before applying adhesive or securing final fasteners.
Set the component according to its specified fixing method, keeping it square to the finished wall plane. Recheck level from more than one direction. A recessed accessory can be mechanically secure and still look wrong if its frame follows a crooked reference line.
Cut the surrounding tile with clean, controlled edges. Diamond blades suited to porcelain and a stable cutting setup help avoid chipped corners, particularly at interior cuts. If a tile-insert cover is part of the design, use the supplied template and maintain the required clearance around the insert. Too little clearance can cause rubbing after grouting; too much creates a visible shadow line that weakens the seamless effect.
Install the tile, respecting movement joints and the manufacturer’s recommended perimeter treatment. Grout only where grout is intended. At transitions requiring flexible sealant, use a high-quality sanitary sealant that matches the surrounding finish. Wipe residue from metal surfaces promptly and protect the frame while grouting to avoid scratches.
After curing, install the brush holder, inner cup, lid, or tile insert. Test the opening repeatedly. It should operate smoothly, close cleanly, and allow the brush to be lifted out without catching on the frame.
Details that determine the final impression
The strongest recessed installations are rarely defined by a single product. They are defined by the decisions around it: the frame is level, cuts are balanced, joints are consistent, and the accessory aligns with the other concealed elements in the room.
Coordinate finishes where they remain visible. A black frame can echo a black flush plate and shower hardware; brushed stainless can create a quieter, more timeless pairing with chrome or nickel. If the room is built around uninterrupted stone-look porcelain, a tile-insert solution may be the better choice because it preserves the material’s continuous surface.
Do not force every accessory into the wall, however. A recess needs sufficient wall depth and a sensible service route. In a thin partition crowded with plumbing or wiring, a poor installation is not worth the visual gain. This is where early planning with the contractor, tile installer, or designer protects both function and finish.
PS-Tile recessed accessories are designed for this level of coordination: precise components that turn a necessary bathroom tool into an integrated part of the architecture.
Keep the recessed brush hygienic after installation
The visual advantage remains only when the holder is easy to maintain. Empty and rinse the removable cup regularly, clean the brush head when needed, and wipe the visible frame with non-abrasive products suitable for its finish. Avoid aggressive scouring pads that can dull coated or stainless surfaces.
A well-installed recessed holder keeps the floor clear, reduces the awkward cleaning zone around a freestanding container, and gives the bathroom a more ordered character. The final goal is simple: every daily-use detail has a place, while the room itself remains the focus.