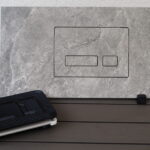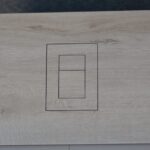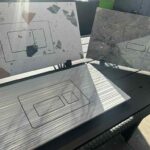
A tile-integrated flush button is not a universal cover that can be fitted over any concealed toilet tank. The answer to which cisterns accept tile buttons depends on the flushing mechanism behind the wall, the size of its service opening, and the actuator family designed for that frame. Get those details right before tile is installed, and the result is a clean, elegant wall surface with no visually separate flush plate.
This is one of the details that separates a carefully designed bathroom from one that merely uses premium materials. A large-format tile wall loses some of its impact when a standard plastic or metal plate interrupts it. A tile button allows the flush control to become part of the architecture, preserving the same material, grout lines, and calm visual rhythm around the toilet.
The cistern itself is only part of the compatibility question
People often ask whether a particular cistern accepts a tile button. In practice, compatibility is determined less by the tank body and more by its flush valve and actuator system. The concealed cistern, installation frame, actuator rods or cables, service opening, and tile-button mounting frame all need to work as one system.
A tile button replaces the visible flush plate, not the internal flushing technology. It must still reliably activate the small and full flush functions, provide access for servicing the fill and flush valves, and sit accurately within the finished tile surface. That is why a product made for one manufacturer’s actuator family cannot simply be adapted to another with a few cuts or extra adhesive.
The rule is simple: choose the tile-button system for the exact concealed cistern series, not just for the brand name.
Which cisterns accept tile buttons?
Tile buttons are most commonly made for widely used in-wall toilet systems with a front service opening and a dual-flush actuator arrangement. In premium bathroom projects, this often means specific concealed cistern lines from Geberit or GROHE, provided the tile-button frame is explicitly designed for that particular series.
For example, a system engineered for a Geberit Sigma concealed cistern uses the Sigma actuator geometry and service opening. It is not automatically compatible with Geberit Delta or Omega systems, even though all three may be concealed cisterns from the same manufacturer. Their operating plates, internal actuation points, and opening dimensions differ.
The same principle applies to GROHE. A tile-button solution intended for a compatible GROHE concealed cistern and its designated flush-plate family must be selected according to the exact installation element and mechanism. Do not assume that a tile button fitting one GROHE frame will fit every Rapid SL installation. Product generations and actuator configurations can vary.
Compatibility should always be confirmed using the manufacturer’s exact model designation. “Geberit” or “GROHE” alone is not enough information to order the correct component.
Front-actuated concealed cisterns are the usual fit
Most tile-button systems are designed for front actuation, where the flush plate is positioned directly above the wall-hung toilet. This layout gives practical access through the opening behind the button panel and creates the most balanced visual composition on a tiled feature wall.
A front-actuated system is particularly suitable when the toilet wall is finished in porcelain, ceramic, natural stone, or large-format sintered slabs. The flush button can be aligned to the tile grid, so the control area looks intentional rather than added afterward.
Side- or top-actuated systems need separate verification
Some concealed cisterns are operated from the top or side. These are common where the frame is installed under a window, within a low-height partition, or in a furniture-based enclosure. A standard front-facing tile-button frame will not solve that condition.
A custom solution may be possible, but it requires a purpose-built component and careful planning. The access panel cannot be sacrificed for appearance. Concealed plumbing remains serviceable only when the opening can be removed without damaging the finished wall.
Why flush-plate families cannot be mixed
Two dual-flush buttons may look similar from the outside, yet their internal action can be completely different. One system may use rigid push rods, another may use pneumatic hoses, lever mechanisms, or a different spacing between actuation points. Even a small mismatch can prevent flushing, cause the valve to run continuously, or make one flush volume unreliable.
The opening behind the plate also matters. A tile button needs enough room for its mounting frame, removable tile insert, actuator adjustment, and future servicing. If the opening is too small, the visible tile may look precise but the hidden installation becomes impractical.
Mixing product families can also affect warranty coverage and serviceability. A concealed cistern is designed to last for years. Choosing a compatible system from the start means replacement valves and routine maintenance can still be handled through the flush opening, without removing surrounding tile.
Check these details before ordering
Before selecting a tile-integrated flush button, identify the concealed cistern exactly. The installation manual, frame label, project specification, or invoice usually contains the model number. If the wall is already closed, the information may also be visible behind the existing flush plate.
Then verify whether the cistern is front-, top-, or side-actuated and whether it uses a two-button dual-flush mechanism. Confirm the flush-plate series, not only the cistern brand. This is the detail that defines the mounting dimensions and actuator connection.
The finished wall build-up should be considered at the same time. Tile thickness, adhesive depth, waterproofing layers, and the desired reveal around the button all affect the final setting. Large-format tile often requires a different cutting strategy than small ceramic tile because the removable insert needs clean, stable edges and precise alignment.
It is also wise to decide early where grout joints will fall. A tile button looks most refined when the insert follows the wall’s geometry rather than fighting it. Depending on the tile format, the best result may be a centered cut-out within one tile or a carefully planned detail aligned with grout lines. The right choice depends on tile size, pattern, and the position of the toilet frame.
Installation quality matters as much as system compatibility
A compatible tile button can still look wrong if it is installed without precision. The frame must sit square, the tile insert must be cut accurately, and the button movement must remain free after grouting. Excess adhesive, grout, or uneven tile edges can create friction and turn an elegant flush detail into a frustrating daily-use point.
This is why templates and proper cutting tools matter. They help establish a consistent opening, protect the visible tile edges, and keep the button aligned with the concealed mechanism. For architects and installers, this is not an accessory step. It is the point where technical accuracy becomes visible design quality.
Waterproofing must also be respected around the service opening. The tile-button assembly should be installed according to the system’s intended method so the wall remains protected while the access area stays removable. A concealed bathroom detail should simplify the room visually, not create a hidden risk behind the tile.
New construction offers the cleanest result
The ideal time to choose a tile button is before the in-wall frame is installed and before tile layout is finalized. At that stage, the cistern family, actuation method, wall depth, tile format, and access requirements can be coordinated as one composition.
Retrofitting is possible only when the existing concealed cistern belongs to a compatible series and the service opening can accept the dedicated mounting frame. An existing standard flush plate does not guarantee a direct replacement. The wall may need adjustment, and the tile area around the opening may need to be rebuilt for a result that looks deliberate.
For renovations, it is usually better to confirm compatibility first than to select a tile button based on appearance. The most luxurious bathroom details are the ones that remain functional long after the project photographs are taken.
Choose the system, then design the surface
A tile button should never be treated as a decorative afterthought. It is a precision interface between concealed plumbing and the visible finish of the room. When it is matched to the correct cistern series and installed with a dedicated frame, it removes one more distracting element from the wall while preserving full access and dependable flushing.
For a quiet, architectural bathroom, start with the exact in-wall cistern model. Then choose the tile-button system made for it, plan the tile layout around it, and let the flush control disappear into a surface that feels clean, functional, and intentionally finished.