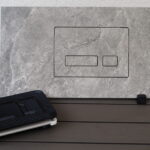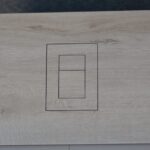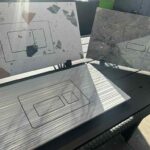
A tiled service panel can disappear almost completely into a bathroom wall. That clean result only works when the joint around it is treated correctly. So, do service panels need sealing? Usually, yes – but not in the same way as a fixed tile joint, and never at the cost of future access.
A service panel may conceal a toilet cistern, shutoff valves, plumbing connections, electrical components, or ventilation controls. It is a technical opening first and a design element second. In a premium bathroom, however, both roles must work together: the panel should protect the wall assembly from moisture while remaining easy to open without cracked grout, damaged tile, or visible compromises.
Do Service Panels Need Sealing Around the Edge?
The short answer is that the perimeter often needs a flexible seal, especially in bathrooms and other humid spaces. What it does not need is a permanent bond that turns an access panel into a piece of fixed wall.
Tile, grout, wallboard, framing, metal access-panel frames, and panel inserts all move differently. Temperature changes, moisture, settling, and normal operation create small amounts of movement. A rigid grout joint around a removable panel is likely to crack or chip over time. Worse, it can make the panel difficult to remove when a valve, flush mechanism, or connection needs service.
A narrow, flexible perimeter joint creates a cleaner and more durable transition. It accommodates movement, limits the entry of splashed water and dust, and keeps the panel visually controlled. In a finished bathroom, that slim shadow line or color-matched seal is far preferable to a broken grout edge.
The exact approach depends on where the panel is installed, what sits behind it, and how the panel opens. A panel in a dry wall beside a concealed toilet frame has different requirements than one inside a shower enclosure. The goal is not to apply sealant everywhere. The goal is to create a protected, accessible detail with no unnecessary visual noise.
Where Sealing Is Most Necessary
Location determines the level of protection. Service panels outside direct water exposure may only need a clean, flexible perimeter joint to control dust and movement. In a powder room, utility wall, or dry zone behind a toilet, this is often sufficient when the surrounding wall has been correctly built.
Panels close to a vanity, bathtub, or shower deserve more attention. Humidity alone is not usually the issue. Repeated splashing and water running down the tiled surface are the concern. Water that reaches an unprotected panel edge can migrate behind the finish, where it may affect adhesives, board materials, framing, or hidden technical components.
Inside a shower or another direct-wet area, the access opening must be planned as part of the waterproofing system, not treated as a last-minute cutout in tile. The waterproof layer behind the tile needs a continuous, manufacturer-approved transition around the opening. The visible perimeter seal then becomes the final exposed defense, not the only defense.
This distinction matters. Silicone around the face of a panel cannot compensate for missing waterproofing behind the tile. A beautiful flush panel is only as reliable as the construction detail behind it.
A Service Panel Must Still Be Serviceable
The most common installation mistake is using grout, construction adhesive, or excessive silicone to make the panel look permanently fixed. It may look tidy on installation day. The problem appears months or years later, when a concealed cistern needs adjustment or a shutoff valve must be reached quickly.
A proper access panel should open predictably, without cutting tiles or destroying the finished joint. Depending on the system, it may use magnets, push-to-open hardware, a concealed latch, or a removable frame. The sealing method needs to respect that opening mechanism.
For many tile-ready panels, a thin bead of sanitary silicone around the outer perimeter is the practical choice. It should be applied as a movement joint, not packed deeply into the opening. The panel should not be glued to its frame. If the manufacturer specifies a gasket, compression seal, or a defined joint width, follow that detail rather than replacing it with a generic sealant solution.
A removable panel can require occasional maintenance of its seal. This is normal. A clean, replaceable seal is more valuable than an invisible joint that prevents access exactly when it is needed.
Grout Is Not a Flexible Seal
Grout is designed for tile joints, not moving interfaces between a wall and an access door. It is rigid. Even high-performance grout cannot solve the basic issue that a service panel and the tiled wall may move independently.
Using grout around the panel also makes future removal unnecessarily destructive. The edge can fracture, tiles can chip, and a formerly elegant detail becomes an obvious repair. Reserve grout for fixed tile-to-tile joints. Use a suitable flexible joint where a panel meets the wall finish.
Not Every Gap Should Be Filled
A panel system may include a deliberate reveal around its edge. That small, consistent gap can be part of the opening function and the intended minimalist appearance. Filling it completely with sealant can interfere with release, collect dirt, or create an uneven line.
Before sealing, check whether the panel is designed for an exposed shadow gap, a silicone joint, or a gasketed closure. The cleanest result comes from respecting the system geometry from the first measurement through final finishing.
Choosing the Right Sealant for a Tiled Bathroom
For exposed bathroom perimeters, use a quality sanitary silicone or another flexible sealant approved for wet areas and compatible with the adjacent materials. It should resist mold and remain elastic after repeated humidity changes. Color matters, too. Clear silicone can work around some surfaces, but a matched or carefully selected neutral color usually creates a more intentional architectural detail.
Avoid ordinary acrylic caulk in areas exposed to regular moisture. It can shrink, crack, or discolor. Also avoid applying sealant over dusty grout, wet tile edges, soap residue, or uncured adhesive. The bead may initially look fine, then separate from the surface.
The joint should be narrow, even, and fully tooled. Excess sealant is not extra protection. It creates a thick, visible border that works against the flush, integrated effect of a tile-ready panel. In a refined bathroom, precision is visible even in a joint only a few millimeters wide.
Installation Details That Protect the Finish
The best time to decide on sealing is before tile installation. The opening must be square, the frame must sit correctly relative to the finished tile depth, and the tile layout should be planned so cuts are balanced around the panel. An access panel placed without regard for the grout grid can become visually dominant, even if the seal itself is perfect.
Measure the finished surface, not just the wall substrate. Tile thickness, adhesive depth, waterproofing layers, and panel hardware all affect the final plane. A panel that sits too far back creates a dirt-catching recess. One that projects outward disrupts the wall line and is more exposed to impact.
For tile-faced panels, use a stable tile backing and make sure the tile is securely bonded before operating the panel. Heavy stone-look porcelain, large-format tile, and natural stone increase the load on hinges, magnets, and latches. The opening hardware must be rated for that weight.
During final sealing, protect the tile face with tape, leave a consistent joint width, and tool the sealant in one controlled pass. Remove tape before the sealant skins over. Then allow full curing time before exposing the area to steam, splashing, or cleaning products.
When You Should Not Seal a Panel Yourself
If the panel provides access to electrical equipment, gas components, fire-rated assemblies, or specialized building systems, do not treat sealing as only a cosmetic task. Local code requirements, equipment clearances, ventilation needs, and the panel manufacturer’s instructions can control the design. Some installations require specific tested assemblies or cannot be sealed in a way that limits ventilation or emergency access.
The same caution applies to a shower panel where the waterproofing detail is uncertain. If there is no clear plan for tying the opening into the wall membrane, ask a qualified installer to resolve it before tile is installed. Repairing a waterproofing failure behind a finished wall is never a small detail.
A service panel should be nearly invisible in daily use, yet immediately available when maintenance is needed. Seal the vulnerable perimeter where the installation calls for it, preserve the intended opening method, and let the finished wall keep its clean, elegant line without sacrificing function.