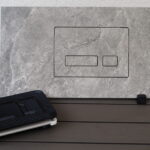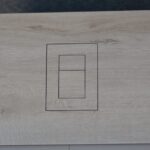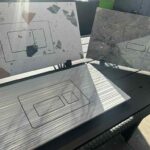
A toilet roll left on a visible arm can interrupt even the most carefully designed bathroom. When you fit a concealed paper holder into the wall, the supply stays exactly where it is needed while the room keeps its clean geometry. The result is quieter visually, easier to organize, and far more aligned with a premium tiled interior.
A concealed holder is not simply a hidden accessory. It is a construction detail that needs to be planned before tile installation, with the same care given to a flush plate, recessed shelf, or built-in toilet brush. Get the position, wall depth, and tile layout right, and the finished detail feels intentional rather than added afterward.
Why fit a concealed paper holder into the wall?
A standard toilet paper holder projects into the room, collects dust around its brackets, and creates another visible material and finish to coordinate. This may be acceptable in a utility bathroom, but it works against the calm, uninterrupted surfaces expected in a modern primary bath or refined powder room.
A concealed paper holder places the roll in a recessed housing behind a tiled front. Depending on the selected system, the visible element may be a discreet opening, a flush tile panel, or a minimal access detail. The paper remains within reach, but the holder does not compete with the vanity, wall tile, or sanitary ware.
This solution is particularly valuable in compact rooms. It removes a protruding fixture from the toilet zone and helps preserve comfortable clearance beside the bowl. In larger bathrooms, its value is primarily architectural: fewer exposed accessories create a more elegant and luxurious composition.
There is also a practical advantage. A properly designed built-in holder defines a fixed place for paper and can conceal reserve rolls. That eliminates the familiar visual clutter of loose packages, baskets, and freestanding storage beside the toilet.
Plan the concealed paper holder before tiling
The best time to choose this detail is during the wall-planning stage, not after the tile has been installed. Recessed products require a cavity, a stable mounting surface, and an opening that aligns with the tile pattern. Retrofitting can be possible, but it usually means removing finished surfaces and accepting more compromises.
Check the wall construction and available depth
First, establish what sits behind the planned location. A stud wall may offer sufficient depth for a recessed housing, while a solid masonry wall requires a carefully formed recess. A service wall built in front of the structural wall is often the most controlled option because it creates room for the concealed component and any plumbing without unnecessary cutting into the building structure.
Do not assume every wall can accommodate the same product. Measure the available depth after accounting for waterproofing board, adhesive, tile, and any framing. The housing must sit correctly relative to the finished tile face. If it is too far back, access becomes awkward. If it sits proud, the clean flush effect is lost.
Also verify the absence of pipes, electrical cables, structural reinforcement, and concealed cistern components. The area around a wall-hung toilet can be busy behind the surface. A precise drawing and coordination with the installer prevent expensive corrections later.
Choose the position for natural use
The holder should be reachable without twisting or leaning. As a general rule, place it on the side wall next to the toilet, where the user can access the roll comfortably from a seated position. The exact height depends on the toilet model, seat height, wall configuration, and the holder’s opening design.
Avoid positioning it so close to the toilet frame, corner, vanity, or shower glass that changing the roll becomes inconvenient. A concealed solution should simplify the experience, not turn a simple task into an awkward one. If the bathroom is used by children, older adults, or guests, favor intuitive access over an overly dramatic hidden effect.
For projects with a left- or right-side constraint, confirm the orientation before the wall is closed. The direction in which the panel opens or the roll is loaded matters. This is a small decision during construction and a daily reality after completion.
How to fit a concealed paper holder with a tile-ready finish
Installation varies by product, but the principle remains consistent: the housing must be rigid, level, waterproofed as part of the wall system, and accurately coordinated with the finish thickness. A concealed accessory can look effortless only when the preparation is exact.
Start by marking the final center line and perimeter based on the finished floor level and the toilet position. Work from the approved tile layout, not from rough dimensions alone. This avoids a narrow tile strip, an off-center joint, or a visible cut that weakens the intended minimalism.
Secure the recessed body to stable framing or masonry according to its mounting points. Check level in both directions before permanently fixing it. Even a minor deviation becomes visible when the tile panel is flush with surrounding joints. The housing should not flex when touched or loaded, since movement can eventually affect grout lines and tile edges.
Next, integrate the waterproofing system continuously around the opening. This detail is especially relevant when the holder is near a shower zone or in a bathroom with full wall waterproofing. Use compatible materials and carefully seal transitions. Recessed does not mean exempt from moisture protection.
Once the substrate is prepared, make tile cuts with the precision expected of a visible architectural detail. A clean edge, even joint width, and correct alignment with adjacent tiles make the holder read as part of the wall. For large-format porcelain, quality cutting equipment and a stable guide are not optional. They are what protects the tile from chipped edges and protects the entire visual result from looking improvised.
Tile-ready concealed systems often use the same tile as the wall face. This is the strongest choice when the goal is near-invisible integration. It works especially well with stone-look porcelain, concrete finishes, and large-format slabs, where uninterrupted material creates a calm, premium surface.
PS-Tile approaches these details as part of the bathroom architecture, pairing built-in accessories with the technical precision needed for tile-based installation. That combination matters because the visible result depends as much on the concealed body and mounting process as on the finished tile.
Design details that determine the final result
A hidden holder should not become difficult to recognize. Minimalism works when the function remains clear. A subtle reveal, discreet opening, or thoughtfully positioned access point gives users enough visual guidance without adding a distracting handle or contrasting hardware.
Tile selection affects this balance. A heavily veined stone-pattern tile can disguise the panel beautifully, but the pattern must be continued carefully across the removable section. A small-format tile makes alignment more forgiving in some cases, while large-format tile creates a more monolithic finish but demands greater cutting accuracy.
Grout color is equally influential. Matching grout to the tile reduces visual interruption and supports a clean wall plane. A strong contrasting grout can make the concealed panel more obvious, which may be desirable if guests need immediate orientation. Neither option is universally better. The right choice depends on whether the bathroom prioritizes absolute visual quiet or instant usability.
Consider the rest of the toilet wall as one composition. A flush plate, toilet brush recess, waste bin, towel hook, and paper holder can all be integrated without creating a collection of visible accessories. The goal is not to hide every object for its own sake. It is to give every necessary function a deliberate place, without the clutter of competing fixtures.
Common mistakes worth avoiding
The most frequent mistake is selecting the holder after the wall is already tiled. This often leads to surface-mounted alternatives, compromised placement, or disruptive rework. Decide early and include the product dimensions in the construction drawings.
Another common issue is ignoring tile thickness and adhesive build-up. The housing may be technically installed, yet the tile panel will not sit flush if the finished depth was calculated incorrectly. Confirm dimensions with the actual tile, especially when using thick natural stone or large-format porcelain.
Finally, do not treat access as an afterthought. The roll must be easy to replace, the internal area must be cleanable, and any serviceable elements should remain reachable without damaging the tile. A concealed product should reduce visual noise, never create hidden maintenance problems.
A well-fitted concealed paper holder earns its value every day in small ways: no projecting arm, no spare rolls on display, no visual interruption on a carefully tiled wall. Plan it while the bathroom is still on paper, and it will look less like an accessory and more like the way the room was always meant to be built.