The best mold resistant bathroom details do not begin with a bottle of cleaner. They begin behind the tile, at every edge where water can settle, air can stagnate, or a loosely planned accessory can create another difficult-to-clean surface. A bathroom that looks calm and luxurious should also make moisture management almost invisible.
Mold is rarely caused by one poor decision. It develops where several small compromises meet: insufficient ventilation, standing water, absorbent joints, cluttered corners, and details that cannot be properly cleaned. The answer is not to fill the room with more accessories. It is to choose fewer, better-integrated elements and give each one a clear function.
Why Mold Resistance Is a Detail-Driven Decision
Tile itself is not a mold food source, but soap residue, skin cells, dust, and persistent moisture are. Grout joints, silicone transitions, unventilated cavities, and the spaces behind freestanding accessories can all hold that combination longer than they should.
This is why a mold-resistant bathroom is not defined by one material labeled “antimicrobial.” It is defined by how quickly surfaces dry, how easily they can be reached, and whether water is directed away instead of left to collect. Clean geometry is not only an aesthetic choice. It is a maintenance strategy.
For a premium renovation, the goal should be a bathroom with continuous visual lines and minimal horizontal clutter. When storage, toilet accessories, and functional hardware are integrated into the wall or precisely placed around the wet zone, the room gains more than visual order. It loses many of the hidden pockets that make routine cleaning frustrating.
Best Mold Resistant Bathroom Details to Plan First
1. A fully waterproofed shower enclosure
Waterproofing is the non-negotiable layer beneath the finished surface. Tile and grout are the visible finish, not the waterproof barrier. A properly specified shower system needs a continuous membrane, sealed corners, protected penetrations, and a reliable connection to the drain.
This is particularly critical at niches, benches, glass channels, and valve openings. These areas combine changes in plane with frequent water exposure. If the assembly behind them is improvised, even the most elegant large-format tile will not solve the risk.
A shower niche should be planned as part of the waterproofing system, not cut into the wall as a late adjustment. It also needs a slight slope toward the shower so water does not remain on its bottom surface. The same principle applies to a built-in bench and any recessed shelf: every horizontal plane must drain deliberately.
2. Drainage that leaves no standing water
A shower floor should guide water cleanly to the drain, with no shallow low spots near walls or corners. Linear drains can create a particularly calm, architectural look because the floor can slope in one direction. Point drains remain an excellent option when the floor format, layout, or budget makes them more practical.
The best choice depends on the tile size and installer’s layout. Large-format tile may work beautifully with a linear drain, while a smaller mosaic can follow the multiple slopes around a central point drain with less cutting complexity. What matters is not the trend, but a finished floor that drains consistently after real use.
Outside the shower, avoid detailing that traps water at the base of a vanity, beside a tub, or below an open toilet brush holder. A few millimeters of thoughtful clearance can make these zones faster to dry and easier to inspect.
3. Recessed accessories instead of surface clutter
Freestanding bathroom accessories often create the hardest cleaning zones in the room. They collect dust at their base, interrupt the wall plane, and leave narrow gaps that are difficult to wipe. In a compact bathroom, they also make the space feel more crowded than it is.
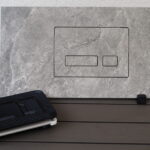
Recessed accessories remove that visual and hygienic burden. A built-in toilet brush holder keeps the brush contained and off the floor. A concealed toilet paper holder avoids a protruding arm and the grime line that can form around its mounting points. An integrated waste bin gives everyday disposal a defined place without adding another object beside the vanity.
The benefit is not that a recessed component never needs cleaning. It does. The difference is that it is designed as part of the tiled surface, with intentional access and a controlled perimeter rather than an accidental gap behind a loose accessory.
For architects and installers, this is where planning before tile selection pays off. The wall cavity, stud positions, plumbing routes, flush plate system, and finished tile thickness must be coordinated early. A clean result is the visible outcome of accurate preparation.
4. Fewer joints, but better-finished joints
Large-format tile can reduce the number of grout joints in a bathroom, which may simplify routine cleaning and strengthen the sense of a continuous surface. It is not automatically the right solution everywhere. Shower floors require dependable slip resistance and sufficient slope, so smaller formats can be the more technically suitable choice.
Where grout is used, a high-quality grout with low absorption and good stain resistance makes maintenance easier. Epoxy grout offers strong resistance to moisture and staining, but it requires careful application and can be less forgiving during installation. Cementitious grout with the right additives can perform well too, provided it is correctly mixed, installed, and maintained.
Silicone joints deserve equal attention. They belong at changes of plane, such as wall-to-floor and wall-to-wall corners, because these areas move differently over time. A neat, correctly sized silicone joint is easier to clean and more reliable than a rigid grout joint forced into a flexible transition.
Choose colors with purpose. Very light grout can make residue visible sooner, while very dark grout may highlight mineral deposits in hard-water areas. A mid-tone selected to work with the tile often provides the most forgiving balance without sacrificing a refined appearance.
5. Ventilation sized for real use
No tile detail can compensate for humid air that has nowhere to go. An exhaust fan should be selected for the room size, duct run, and expected use, then installed so it actually removes moist air outdoors. A fan that is too weak, excessively noisy, or poorly ducted often goes unused or performs below expectation.
A timer or humidity sensor can be a practical upgrade. It allows ventilation to continue after a shower, when the room still looks dry but humidity remains elevated. In a windowless bathroom, this detail is especially valuable.
Ventilation also needs make-up air. If a tightly closed door prevents replacement air from entering the room, the fan cannot work efficiently. A suitable door undercut or transfer path helps the system draw moisture out instead of simply running in place.
Materials That Support a Cleaner Bathroom
Nonporous surfaces are naturally easier to maintain than heavily textured or unfinished materials. Porcelain tile, properly finished glass, quality metal, and solid-surface elements can all work well when their edges and transitions are detailed cleanly.
Texture has a trade-off. A heavily structured wall tile may look striking under showroom lighting, but its ridges can retain soap film in the shower. Matte tile can be elegant and practical, yet some very matte finishes show mineral deposits more readily than a smoother surface. The right decision depends on water hardness, cleaning habits, and where the material will be used.
Metal components should be chosen for their intended environment, not just their finish. In wet zones, corrosion resistance and durable construction matter as much as color. A premium bathroom loses its precision quickly when a small accessory begins to discolor around its edges.
Installation Precision Protects the Finished Look
Mold resistance is often decided before the first tile is set. Correct substrate preparation, flat walls, accurate cuts, and compatible installation materials prevent stress points that later become cracks, gaps, or water paths.
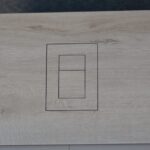
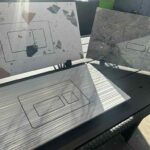
Integrated details demand especially precise work. A recessed holder or flush plate should sit aligned with the tile grid, while its frame must account for adhesive thickness and the final finished surface. Cutting templates and quality tile-cutting tools are not minor conveniences here. They help create controlled openings with clean edges, which keeps seals accurate and the finished wall visually quiet.
PS-Tile solutions are designed around this principle: functional bathroom elements should disappear into the architecture rather than compete with it. The result is a room with fewer interruptions, more usable floor area, and less surface clutter to clean around.
Everyday Habits That Preserve Mold Resistance
Even a carefully detailed bathroom needs basic care. Run the fan during and after showers, pull water from glass and tile when practical, and avoid leaving wet towels bundled on the floor. Clean soap residue before it becomes a film, especially around shower controls, niche shelves, and silicone joints.
Inspect silicone and grout periodically rather than waiting for visible staining. Early changes such as separation, cracking, or persistent discoloration are easier to correct than moisture damage hidden behind finished surfaces.
The most successful bathroom details feel almost unnoticeable in daily use. Water drains away, accessories stay in their place, surfaces remain open and reachable, and the room keeps its clean, elegant character long after installation. That is the standard worth designing for.