
A recessed toilet paper holder, concealed brush, or wall niche only looks effortless when the cavity behind it has been planned with equal precision. To size wall cavity correctly is not simply to cut an opening that matches the product dimensions. It means allowing for framing, plumbing, waterproofing, tile thickness, installation tolerance, and the visual rhythm of the finished wall.
This is the detail that separates a clean, architectural bathroom from one where a supposedly built-in element sits too deep, projects past the tile, or interrupts the layout with awkward cuts. A wall cavity is invisible after installation, but it determines whether the finished surface feels elegant and intentional.
Start With the Finished Wall, Not the Studs
The most common mistake is measuring from the unfinished framing alone. Stud depth is only one part of the available space. A finished tiled wall includes the wallboard or backer board, waterproofing membrane, tile adhesive, and tile. Depending on the system, this build-up often takes up 1/2 inch to more than 1 inch of depth.
Measure the cavity from the finished face of the tile backward, then compare that dimension to the installation depth specified for the recessed component. This is especially important for flush-mounted details. Their front edge should align with the tile plane or sit at the exact position intended by the manufacturer.
A component installed even slightly behind the tile can collect dust around its perimeter and lose its crisp, integrated appearance. One installed proud of the surface becomes a visual interruption and may catch towels, clothing, or cleaning tools. In a minimalist bathroom, millimeters are visible.
Understand nominal and actual wall depth
In many American homes, a 2×4 wall has an actual stud depth of 3 1/2 inches, not 4 inches. A 2×6 wall provides an actual depth of 5 1/2 inches. Once boards, membranes, adhesive, and tile are added, usable cavity depth becomes smaller.
A standard 2×4 partition can accommodate many shallow recessed accessories, but it is not automatically suitable for every product. A concealed waste bin or larger integrated storage module may require more depth than the wall can safely provide. A 2×6 service wall, a furred-out wall, or a purpose-built false wall may be the cleaner solution.
Do not force a deep component into a shallow partition just to preserve a few inches of room. The trade-off is usually poor installation access, compromised waterproofing, or interference with pipes and cables. A carefully planned service wall protects both function and the calm, uncluttered result you want to see.
Size the Opening, Then Add Installation Tolerance
The rough opening is not always the same as the visible opening. Some recessed products are designed to fit tightly between framing members, while others require a precise framed box, fixing flange, or clearance around the body. Always work from the product’s technical installation dimensions rather than estimating from the front frame.
As a practical rule, identify three separate measurements before cutting anything: the external body size, the required rough opening, and the finished face dimension. These values can differ significantly.
A little tolerance is useful, but excessive space is not. An oversized opening makes it harder to secure the body squarely and can weaken support around the unit. It also leaves more area to repair with backing material and waterproofing. The goal is a controlled fit that allows adjustment during installation without leaving the component unsupported.
Frame for support, not just clearance
Horizontal blocking above and below the opening gives a recessed component a stable, straight mounting surface. For larger accessories, add side blocking or build a complete framed box. This keeps the cavity square and reduces the risk of movement when the product is used daily.
Support matters even for compact details. A concealed toilet paper holder is handled repeatedly. A recessed trash bin is pulled outward, loaded, and cleaned. If the framing is not firm, movement can crack grout lines or compromise sealant joints over time.
Keep framing dimensions consistent. Check the opening for square by measuring diagonally, and confirm that the front mounting plane is level and flush with adjacent wallboard. Correcting a crooked cavity after tile installation is costly and rarely invisible.
Protect the Structure Before You Cut
Not every wall can be opened freely. Before sizing a wall cavity, establish whether the wall is load-bearing and locate all mechanical services. This applies to new construction and remodeling alike.
A vertical stud may carry structural load, support a door header, or stabilize a partition. Cutting it without an approved framing solution can affect the wall’s performance. If the cavity requires altering studs in a load-bearing wall, involve a qualified contractor, structural professional, or engineer as appropriate for the project and local code.
Plumbing and electrical routes need the same respect. Drain pipes, vent stacks, water lines, electrical cables, low-voltage wiring, and HVAC components are commonly concealed in bathroom partitions. A stud finder is only a preliminary tool. Open a small inspection area or confirm service locations from construction plans before committing to the full cutout.
When wiring or piping must pass near the cavity, maintain required clearances and use protective nail plates where needed. Never compress, reroute, or conceal connections merely to make an accessory fit. A clean wall should never come at the expense of serviceability or safety.
Plan Waterproofing as Part of the Cavity
In a wet area, the cavity is not complete when the framing is done. It becomes part of the shower or bathroom waterproofing system. The transition between the recessed body, wall substrate, and membrane must be continuous and compatible with the selected materials.
For a shower niche or any recessed accessory located in a direct spray zone, use a purpose-designed waterproofing approach. The cavity needs a stable backer, sealed corners, properly integrated membrane, and a reliable connection around the perimeter of the unit. Water that reaches an unprotected wall cavity can damage framing, insulation, and adjacent finishes long before it becomes visible.
Slope horizontal surfaces slightly toward the room or shower interior where appropriate, so water does not stand against the rear edge. Avoid relying on grout as the waterproof layer. Grout finishes the joint; it does not replace a correctly installed membrane and perimeter seal.
Outside the direct wet zone, waterproofing requirements may differ, but moisture resistance and clean finishing still matter. Bathrooms experience humidity, splashes, and regular cleaning. Select materials that remain stable in that environment and follow the component manufacturer’s instructions for sealing and fixing.
Let Tile Layout Determine the Exact Position
A correctly sized cavity can still look wrong if it ignores the tile grid. Before framing the opening, set out the tile layout on the wall. Mark full tiles, cut lines, grout joints, centerlines, and the height of surrounding fixtures.
The best position often lets the recessed detail align with grout joints or sit centered within a tile field. This reduces narrow tile strips and gives the wall a more composed appearance. In large-format tile, the accessory may be centered to a visual axis rather than a grout line. It depends on tile size, pattern, and the location of the vanity, toilet, or shower controls.
For example, placing a concealed paper holder beside a wall-hung toilet should consider the toilet centerline, the flush plate, the seat clearance, and the tile joint pattern together. Treating each choice separately is how a bathroom gains small visual conflicts. Planning them as one composition produces a quieter, more luxurious result.
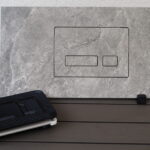
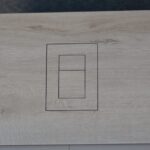
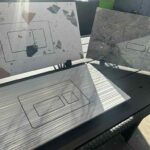
Templates are valuable here. A precise cutting template helps transfer the opening location onto the tile and maintain a controlled reveal around the finished frame. For professional installers, this reduces correction work and protects expensive porcelain or large-format slabs from unnecessary recuts.
Check Accessibility and Everyday Use
Dimensions are not only about what fits inside the wall. They also determine whether the detail is comfortable to use. Position recessed elements where they can be reached naturally without interfering with doors, drawers, shower glass, or sanitary fixtures.
A hidden toilet brush should be close enough to the toilet for practical use but not so close that it competes with the flush plate or makes cleaning around the bowl difficult. A recessed waste bin needs enough clearance to open and remove the inner container. A towel hook must account for the towel’s drop and for the path of a door.
Think beyond the installation day. Ask how the component will be cleaned, emptied, replenished, or serviced years later. The most elegant built-in details are designed to disappear visually, not to become difficult to maintain.
A Final Check Before the Tile Goes Up
Before waterproofing and tile make changes difficult, dry-fit the recessed component in the completed framed opening. Verify its depth against a sample of the actual wall build-up, including the chosen tile. Check it for level, plumb, square, and secure fixing points.
This is also the right moment to confirm that the visible frame will land exactly where the tile layout intends. At PS-Tile, recessed bathroom details are designed to remove visual noise, but their premium effect starts behind the wall. Give the cavity the same attention as the visible finish, and the result will remain clean, functional, and quietly refined every day.
[…] plumbing, electrical cable, a concealed cistern, insulation, or a structural element. Measure the available cavity depth before selecting the product, not after cutting the opening. A wall with a shallow service cavity […]