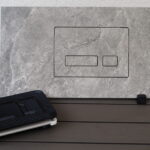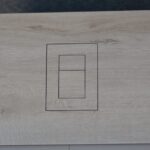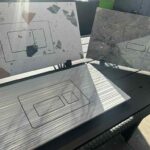
A flush plate is one of the smallest visible elements in a concealed toilet installation, yet a poorly cut tile opening can make it the first thing people notice. A Geberit flush plate template gives the installer a controlled reference for transferring the opening onto the tile, so the finished plate sits cleanly within the wall composition rather than looking like an added-on technical detail.
For a bathroom designed around continuous surfaces, precise alignment is not a minor finishing step. It is what separates a clean, architectural wall from a result interrupted by uneven joints, chipped edges, or a plate positioned slightly off center.
Why the Geberit Flush Plate Template Matters
A concealed cistern keeps the mechanism behind the wall, but the flush plate remains necessary for activation and service access. Its visible area should feel intentional. When the tile opening is oversized, irregular, or out of alignment, even a premium flush plate loses its visual effect.
The template simplifies a sensitive part of installation: marking the correct cutout location in relation to the Geberit mounting frame and the surrounding tile layout. It helps create a repeatable result, especially when working with large-format porcelain, rectified tiles, stone-effect surfaces, or a wall where every grout line has been carefully planned.
This accuracy also has a practical purpose. The opening must provide the clearance required for the flush plate and service access without exposing unnecessary gaps around the edges. Too tight, and installation can become difficult. Too loose, and the wall loses its clean finish. The right cut is precise, not merely large enough.
The Tile Layout Comes Before the Cut
The template is a finishing tool, not a substitute for planning. Before marking the tile, establish the visual centerline of the wall and decide how the flush plate relates to the tile grid. On a symmetrical wall, the plate is often centered on the toilet axis. On a wall with an offset niche, concealed toilet brush, or integrated toilet paper holder, the composition may require a different visual balance.
This is particularly relevant in minimalist bathrooms. A large tile can make the flush plate appear almost invisible when the opening and joints are clean. Conversely, a small alignment error becomes more obvious because there are fewer visual elements to distract from it.
Confirm the final tile thickness, adhesive bed, waterproofing build-up, and the finished-wall position before cutting. The concealed frame may be installed correctly, but the visible result depends on where the tile face ultimately lands. A template should always be used with the installation requirements of the specific Geberit system and flush plate model.
How to Use a Geberit Flush Plate Template
Start only after the wall structure is stable and the final layout has been checked dry. Place the tile against the wall or use measurements transferred from the finished frame position. The goal is to locate the opening from reliable reference points, not to estimate it from the center of the room.
Position the template according to the system’s intended mounting points and verify its orientation before marking. Check the horizontal level and the relationship to nearby grout lines. A template can be perfectly positioned on the frame but still look visually wrong if the tile layout has shifted by a few millimeters.
Mark the cut line clearly on the finished face of the tile. For polished, textured, or dark surfaces, use a marking method that remains visible but can be removed without staining. Then inspect the planned opening one more time before cutting. This brief pause prevents expensive waste, especially with large-format slabs or tiles with directional veining.
Cut the opening using equipment suited to the tile material and thickness. A quality diamond blade is essential for controlled edges, while a wet-cutting method may be the better choice for dense porcelain or natural stone. Internal corners deserve particular care. Rushing them can create stress points that lead to cracks extending beyond the cutout.
After the tile is installed, verify that the opening remains clean and unobstructed. Remove adhesive residue before fitting the flush plate. The plate should sit neatly against the finished surface, with no visible debris, uneven support, or pressure from a tile edge.
Precision Is More Than a Straight Cut
A straight opening is only part of the result. The flush plate must also appear level, centered, and proportionate to the wall. This is why professional installation checks both technical and visual alignment.
Consider a wall with vertically stacked large-format tiles. If the plate is placed just slightly above or below the intended joint line, the asymmetry may be visible from across the room. On patterned marble-look tile, an opening cut through a strong vein can create a fragmented appearance. In these cases, shifting the tile layout before installation may produce a more elegant result than forcing the plate into a predetermined position.
Common Errors That Compromise the Finish
The most common mistake is cutting based on rough measurements rather than the actual frame and template position. A few millimeters may seem insignificant during rough construction, but around a compact flush plate those millimeters are visible.
Another issue is using a generic opening shape for different systems. Concealed cisterns and flush plates are not interchangeable simply because they appear similar. The template must match the relevant Geberit installation configuration. The same applies when choosing a flush plate after the wall has been tiled. Decide on the compatible system and plate before the tile cut is made.
Installers should also avoid treating the opening as an area that will be hidden completely. Flush plates cover much of the cutout, but they are not designed to disguise major inaccuracies, chipped tile corners, or uneven wall buildup. A clean result starts behind the plate.
Finally, do not overlook grout and edge finishing. Grout lines that terminate awkwardly at the opening or heavy silicone around the plate can disrupt an otherwise refined wall. The detail should remain discreet. The goal is a precise service opening, not a decorative frame around a technical component.
Where a Template Adds the Most Value
A Geberit flush plate template is valuable in any tiled toilet wall, but it becomes especially useful in bathrooms where precision defines the entire design. These include large-format installations, continuous stone-look walls, matte dark tiles, and projects that combine multiple recessed accessories.
In a compact guest bathroom, the benefit is efficient use of limited wall area. In a larger primary bathroom, it supports the calm, luxury feel created by uninterrupted surfaces. For architects and tile professionals, it helps standardize a detail that must work reliably across repeated projects without sacrificing visual quality.
The template is also a practical choice when the flush plate is integrated with other built-in elements. A recessed toilet brush, concealed waste bin, or flush-mounted paper holder can all contribute to a wall free of protruding accessories. The flush plate should support that same language: functional, accessible, and visually quiet.
Clean Walls Need Precise Technical Details
Minimalist bathrooms are not created by removing every visible element. They are created by giving every necessary element a deliberate place. The flush plate remains visible, so its installation deserves the same care as the tile selection, lighting, and concealed accessories around it.
A correctly used Geberit flush plate template makes that care repeatable. It helps turn a functional access point into a clean part of the wall, preserving the order, hygiene, and elegant restraint that define a well-designed bathroom.