A beautiful tiled bathroom can still fail behind the surface. The question “is tile adhesive waterproof?” matters because tile, grout, and adhesive each have a different job. Adhesive holds the finish in place. Waterproofing protects the wall or floor assembly from moisture that would otherwise reach the substrate.
For a bathroom designed with clean lines, recessed accessories, and no visual clutter, this distinction is not a technical footnote. It determines whether the finished space remains elegant and durable years after installation. A premium result begins behind the tile, where the layers cannot be seen.
Is Tile Adhesive Waterproof?
Most tile adhesive is water-resistant to a degree, but it should not be treated as the primary waterproof barrier in a shower, wet room, or other regularly wet area. Cement-based thinset mortar is designed to bond tile to a properly prepared surface. Once cured, it can tolerate moisture exposure, but moisture can still move through the tile joints, grout, and mortar bed.
Even waterproof epoxy grout does not transform a wall into a waterproof assembly. Water often finds its route at inside corners, pipe penetrations, niches, transitions around drains, and joints where different building materials meet. These are the locations that require deliberate waterproofing details.
The practical rule is simple: use adhesive for adhesion and a tested waterproofing system for waterproofing. If a bag or bucket of adhesive is described as water-resistant, flexible, or suitable for wet areas, read that as a performance benefit, not permission to omit the membrane.
What Actually Makes a Tiled Surface Waterproof?
A waterproof tiled wall is a system. It starts with a stable substrate, continues with a waterproof membrane, and ends with correctly installed tile and sealed movement joints. Every layer has to work with the next.
For showers and high-moisture zones, installers commonly use either a liquid-applied waterproof membrane or a sheet membrane. Liquid systems are brushed or rolled onto the substrate and reinforced at corners, seams, and penetrations where required. Their strength is flexibility around irregular details. The trade-off is application control: the membrane must achieve the specified dry thickness, and thin spots can compromise performance.
Sheet membranes provide a consistent manufactured thickness and can be especially precise around flat wall areas, shower niches, and prefabricated components. Their quality depends on careful seam overlaps, compatible sealing material, and disciplined work around every opening. Neither solution is inherently better in every project. The right choice depends on the substrate, geometry, drainage design, and the installer’s familiarity with the system.
Tile is then bonded over the cured membrane using an adhesive approved by the membrane manufacturer. This compatibility matters. Mixing products without checking the technical requirements can affect bond strength, curing, or warranty conditions.
Tile and grout are not the waterproof layer
Porcelain tile has very low water absorption, which makes it an excellent finish for bathrooms. Yet a tiled surface contains joints. Cement grout is porous, and even dense grout joints are not intended to carry the entire burden of stopping water behind a shower wall.
Silicone or a compatible flexible sealant belongs at changes of plane, such as wall-to-wall and wall-to-floor corners. Grout is rigid. Building materials move slightly with temperature, moisture, load, and settling. A flexible joint prevents that movement from turning into cracks in an otherwise clean surface.
Where Waterproofing Is Non-Negotiable
Inside a shower enclosure, around a bathtub used for showering, on wet-room floors, and at shower niches, waterproofing is essential. The same applies around floor drains and wherever plumbing penetrates a tiled surface. These areas are repeatedly exposed to direct water, not simply occasional splashes.
Outside the immediate shower zone, requirements depend on the room and local construction standards. A bathroom backsplash behind a vanity may not need the same full membrane system as a walk-in shower. Still, moisture-resistant boards, careful sealing around fixtures, and thoughtful detailing are worthwhile. A small leak behind a wall-mounted faucet or a concealed toilet component is far more expensive to resolve after tile has been installed.
Floor waterproofing deserves particular attention in barrier-free showers. The membrane must connect correctly to the drain assembly and extend according to the chosen system design. A flawless large-format tile does not compensate for a weak drain connection beneath it.
Choosing the Right Adhesive for a Wet Area
Once the waterproof layer is defined, select the adhesive based on the tile and installation conditions. Large-format porcelain, natural stone, mosaics, heated floors, and vertical wall tiles do not always call for the same mortar.
For most shower walls, a high-quality polymer-modified thinset mortar is a reliable choice when it is approved for the membrane and tile type. Its improved bond and flexibility support demanding vertical applications. Large and heavy tiles may require a non-sag mortar so the layout remains precise while the adhesive cures. For floor installations, a medium-bed or large-and-heavy-tile mortar can help compensate for minor variations and provide proper support beneath larger tiles.
Premixed adhesive can be convenient for certain dry-wall applications, such as a kitchen backsplash. It is generally not the first choice for a shower or continuously wet environment. Drying conditions behind low-absorption porcelain can be slow, and wet-area performance may be limited. The product label, technical data sheet, and specified substrate always take priority over convenience.
Natural stone adds another decision point. Some stones are sensitive to moisture or discoloration and require white adhesive, rapid-setting materials, or a specific setting method. An elegant stone finish deserves the same precision behind the surface as it does in the visible pattern.
Recessed Details Need Waterproofing Continuity
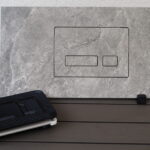
Built-in bathroom accessories create a quieter, more architectural interior. Recessed toilet brush holders, concealed paper holders, integrated waste bins, flush plates, and towel solutions remove protruding objects from the wall plane. But each recessed detail also changes the wall assembly and must be planned before waterproofing and tile layout begin.
The opening must be dimensionally accurate, structurally secure, and compatible with the chosen wall construction. Waterproofing should return into the reveal or connect to the component’s intended sealing detail so that the membrane remains continuous. Simply applying adhesive around the cutout is not enough.
This is especially relevant when the accessory sits near a shower zone, vanity, or plumbing wall. A crisp tile edge around a built-in component is only part of the result. The concealed perimeter must manage moisture without creating a hidden weak point.
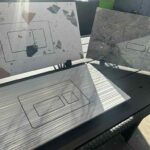
Planning early also protects the visual composition. Set the height of recessed accessories, flush controls, niches, and tile joints before cutting begins. A centered layout, narrow and consistent joints, and clean reveals make the installation feel intentional rather than fitted around obstacles. Precision cutting tools and templates are not extras in this stage. They are what keep a technical opening from becoming a distracting visual interruption.
Common Mistakes That Create Hidden Damage
The most expensive tile problems are often caused by shortcuts that look acceptable on installation day. Skipping a membrane because the adhesive claims wet-area suitability is one. Applying a liquid membrane too thinly is another. So is forgetting reinforcing fabric or sealing tape at corners and wall penetrations when the selected system requires it.
Other failures come from poor substrate preparation. Dust, weak plaster, loose boards, uneven walls, or unprimed absorbent surfaces can reduce adhesion and create movement beneath the tile. Waterproofing cannot correct an unstable wall, and a strong adhesive cannot repair a flawed waterproofing plan.
Rushing cure times is equally risky. Membranes, adhesives, grout, and sealants need the specified conditions to cure properly. Cool temperatures, high humidity, limited ventilation, and dense porcelain can all extend the process. A professional installation is not defined only by speed. It is defined by respecting the sequence that keeps every concealed layer functional.
A Clean Bathroom Depends on What You Do Not See
The most refined bathrooms feel calm because every visible element has a clear place. Tile lines align. Built-in details sit flush. Surfaces are easy to clean. That visual order relies on hidden construction choices made before the final tile is pressed into adhesive.
Treat waterproofing as the protective architecture of the room, then choose adhesive as the high-performance bond that supports the finish. When both layers are specified correctly, the result is more than a waterproof bathroom. It is a clean, elegant space built to stay that way.