
A concealed toilet only looks effortless when every hidden component has been selected with precision. Grohe cistern compatibility is not simply about whether a flush plate fits an opening. It determines whether the button operates correctly, the tile line stays clean, and the cistern remains accessible for service after the wall is finished.
For a bathroom without visual clutter, the flush plate is more than a control element. It is one of the few visible details on a concealed installation. Its dimensions, position, finish, and integration with the surrounding tile shape the final impression. Getting compatibility right before tiling protects both the technical function and the architectural clarity of the room.
What Grohe Cistern Compatibility Actually Means
A Grohe concealed cistern is a coordinated system: the in-wall frame, cistern, flushing valve, actuator mechanism, mounting hardware, and flush plate must work together. A plate may look similar to another model, yet use a different connection geometry or actuation method. Visual similarity is not proof of compatibility.
In practical terms, compatibility means three things. First, the flush plate must match the cistern’s actuation system. Second, the opening and mounting area must be prepared for the selected plate and any tile-integrated solution. Third, the finished wall depth must allow the mechanism to move freely and leave the service opening usable.
This distinction matters most in premium bathrooms, where a small misalignment is immediately visible. A button that sits proud of the tile, an uneven reveal, or a plate that cannot be removed cleanly turns a refined wall into a technical compromise.
Start With the Cistern, Not the Flush Plate
The cleanest installations are planned from the concealed frame outward. Identify the exact Grohe cistern model before selecting a flush plate, tile template, or custom flush solution. The product family, production generation, and actuator configuration can all affect the components that fit.
Do not assume that all Grohe plates work across every Grohe cistern. Some systems are designed for particular pneumatic or mechanical actuation arrangements, while older installations may require specific replacement parts. If the cistern is already installed, check the identification information on the frame or through the service opening before ordering anything.
For new construction, the decision is simpler but still needs discipline. Choose the cistern and flush solution as one package in the design phase. This lets the installer establish the correct opening, account for tile thickness, and align the plate with grout joints or the centerline of the toilet.
Mechanical Details Behind a Minimalist Finish
The visible flush plate conceals several functional parts: rods or pneumatic connections, a mounting frame, retaining points, and access to the fill and flush valves. These pieces need the correct spacing and travel. Even a few millimeters of excess mortar, adhesive, or tile buildup can interfere with movement.
A recessed or tile-integrated flush button adds another layer of precision. The surrounding tile must be cut accurately, the opening must remain square, and the panel must sit flush without binding. This is where a dedicated template for the Grohe system becomes more than an installation aid. It creates a controlled opening that supports an elegant, repeatable result.
Flush Plates, Tile-Integrated Buttons, and Service Access
A standard flush plate is designed to cover its own service opening. A tile-integrated button follows a different visual logic: it reduces the contrast between the control surface and the wall, allowing the tile to remain the dominant material. The result is quieter, more intentional, and better suited to bathrooms built around continuous surfaces.
That visual advantage should never remove access to the cistern. The opening behind the button remains the route for maintenance, adjustment, and replacement of internal components. A well-designed concealed solution keeps service access discreet, not impossible.
Before installation, confirm that the selected button or mounting system preserves adequate access for the specific Grohe cistern. Also verify how the button is removed after tiling. A service panel that requires force, damages the tile edge, or cannot be released once silicone is applied is not a premium detail.
For this reason, the wall finish should be planned as part of the system. Tile thickness, adhesive bed, waterproofing layers, and final joint width all influence the finished opening. The goal is a clean, consistent perimeter that does not trap the operating panel or create a visible shadow line.
The Wall Build-Up Is Part of Compatibility
Many compatibility problems begin before the flush plate is even chosen. The frame may be correctly installed, but the wall build-up is treated as an afterthought. On a tiled wall, every layer changes the final depth from the face of the cistern frame to the finished surface.
Large-format porcelain, natural stone, mosaic, and handmade ceramic can all require different cutting and setting approaches. A thin wall tile and a thick stone slab do not produce the same reveal. If the plate or tile-integrated button is set using dimensions intended for a different finish thickness, it can sit recessed, protrude beyond the tile, or operate inconsistently.
The installer should establish the finished tile plane before setting the template. That means accounting for board thickness, waterproofing, adhesive, tile, and any leveling variation. It is a small planning step with a major effect on the final bathroom.
This is also why precise cutting tools matter. An opening around a flush control is a focal detail, particularly on a large uninterrupted wall. Straight cuts, clean corners, and controlled edge finishing maintain the luxury of the surface. Rough cuts may be hidden by a conventional plate, but they become obvious around a minimalist recessed solution.
Common Grohe Cistern Compatibility Mistakes
The most expensive errors are usually not dramatic. They are small assumptions made at the wrong stage of the project.
A frequent mistake is selecting a flush plate based only on its design or finish. Matte black, brushed metal, and glass surfaces can all look right in a showroom, but the plate still needs the correct internal actuator arrangement. Confirm the system first, then choose the finish.
Another issue is mixing parts from different manufacturers because their dimensions appear close. Concealed cisterns are not universal behind the wall. Geberit, Grohe, and other systems use their own frames, openings, and actuation details. A template or integrated button should be designed specifically for the cistern system it will serve.
Installers also sometimes tile too early. Once the tile is fixed, changing the opening position or correcting a depth error becomes slow and costly. Dry-fit the mounting frame, actuator components, and visible panel before final grouting. Check that the button moves correctly and can be removed for service.
Finally, avoid treating the access opening as a place to hide uneven work. A minimal bathroom makes details more visible, not less. The tighter and cleaner the design, the more every reveal, joint, and alignment matters.
A Better Planning Sequence for Grohe Systems
For a dependable result, first confirm the exact Grohe frame and cistern model. Next, select a compatible flush solution and review its mounting requirements. Then determine the finished wall build-up, including the actual tile and adhesive thickness rather than an estimate.
After that, position the template according to the final tile plane and the desired composition of the wall. On a large-format installation, it may be worth aligning the button opening with tile edges or centering it within a panel. The choice depends on the tile layout, but it should be intentional rather than accidental.
Before the wall is completed, test the complete mechanism. The button should sit evenly, actuate both flush volumes as intended, and come off without stressing the surrounding finish. Only then should the final tile installation and grouting proceed.
PS-Tile approaches these hidden details as part of the finished architecture, not as accessories added at the end. A compatible Grohe template and a properly planned tile-integrated control allow the wall to remain clean, elegant, and free of unnecessary visual interruption.
The best concealed installation does not ask for attention. It simply leaves the bathroom calmer, easier to maintain, and visibly more refined every time the door opens.
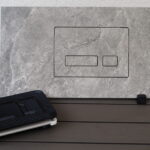
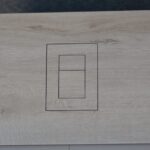

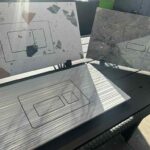
[…] same principle applies to GROHE. A tile-button solution intended for a compatible GROHE concealed cistern and its designated flush-plate family must be selected according to the exact installation element […]