
A flush plate can either complete a clean wall composition or interrupt it with uneven joints, chipped tile edges, and visible corrections. A Grohe flush plate template is the detail that protects the result before the tile is ever installed. It gives the installer a precise reference for the opening around a concealed flush plate, so the finished surface remains calm, aligned, and free of unnecessary visual noise.
For a bathroom designed around large-format tile, recessed accessories, and refined materials, precision at the WC wall matters. The flush plate sits in one of the most visible locations in the room. A few millimeters of error can be enough to make an otherwise premium installation look improvised.
Why the flush plate opening deserves precision
A concealed cistern hides the technical part of the toilet system inside the wall. The flush plate remains visible, but it should feel integrated into the architecture rather than added onto it. This is especially true when the plate is recessed or surrounded by tile with tight, even joints.
Without a dedicated cutting reference, installers often measure the opening from a drawing, transfer dimensions to the tile, and cut manually. This approach can work, but it leaves more room for small inaccuracies. Tile thickness, adhesive build-up, wall tolerances, and the position of the mounting frame all affect the final fit.
A correctly selected template creates a fixed cutting guide. It helps establish the shape and position of the opening before the tile is installed, reducing guesswork where it is most expensive. The benefit is not only a faster workflow. It is a more elegant result: uniform gaps, properly centered controls, and an opening that does not draw attention away from the wall finish.
What a Grohe flush plate template does
A Grohe flush plate template is designed to match a specific Grohe concealed installation and compatible flush plate configuration. Its purpose is to mark or guide the tile cutout around the service opening and the visible plate area.
In practical terms, the template helps the installer control three critical points: the opening dimensions, its exact position relative to the cistern frame, and the clearance needed for final installation and servicing. That clearance is essential. A cutout that is too tight may prevent the plate or mounting components from seating correctly. A cutout that is too large creates distracting gaps that the plate may not fully cover.
The template also supports a cleaner installation sequence. Instead of treating the flush plate as a final detail added after tiling, it becomes part of the wall layout from the start. This is the right approach for premium bathrooms, where every visible component should have a defined relationship to the tile grid, grout joints, niches, and other built-in elements.
Compatibility comes before cutting
Not every Grohe flush plate uses the same opening geometry. Before ordering or using a template, confirm the exact concealed cistern system, the flush plate range, and whether the installation is standard surface-mounted or recessed into the finished wall.
This step cannot be skipped. Grohe systems, mounting frames, and plate designs can differ by generation and application. A template that looks similar may still create the wrong cutout. The result can be a plate that sits off-center, does not cover the tile edge, or cannot be removed correctly for access to the cistern mechanism.
For architects and contractors, this means specifying the cistern and flush plate early. For homeowners, it means avoiding the common mistake of choosing a plate based only on finish or appearance after the wall has already been tiled. The technical system and the visual plate must be selected as one coordinated assembly.
Recessed plates require closer control
A recessed flush plate creates a particularly refined look because the control sits closer to the tile surface. It reduces projection from the wall and supports the minimalist character of a built-in bathroom. But it also exposes every inaccuracy around the opening.
With a surface-mounted plate, a wider cover edge can hide small deviations. With a recessed solution, the relationship between tile, frame, and plate is more visible. The opening must therefore be cut with greater accuracy, and the finished tile surface must remain flat around the perimeter.
This is where a purpose-made template provides real value. It helps transform a technical opening into a controlled architectural detail.
Planning the tile layout around the plate
The best flush plate installation begins before tile cutting. First, establish the plate’s centerline and finished height based on the cistern installation instructions. Then review how that position relates to the selected tile format.
On large-format porcelain, the most luxurious result often comes from placing the opening within a single tile whenever possible. This reduces grout lines around the plate and preserves the visual continuity of stone-look, concrete-look, or solid-color surfaces. It also requires careful handling because a large central cutout can weaken the tile during cutting and installation.
With smaller tile, a grout joint may need to align near the plate. That can be visually successful when the layout is deliberate and symmetrical. What should be avoided is an accidental composition where narrow tile strips, uneven cuts, or broken joint lines crowd the flush plate.
Consider these four checks before the tile is cut:
- Confirm the finished wall depth, including waterproofing, adhesive, and tile thickness.
- Verify the exact Grohe cistern and flush plate model against the template.
- Set the plate position in relation to the tile grid, not only the rough wall opening.
- Dry-fit the relevant frame or plate components before final grouting.
These checks take little time compared with replacing a large porcelain tile after the adhesive has cured.
A precise installation sequence
Once compatibility and layout are confirmed, the template should be used on the actual tile surface rather than relying on approximate site measurements. Mark the cutout carefully and account for the orientation of directional tile patterns, veining, or textured finishes.
For porcelain and ceramic tile, the cutting method should match the material. A high-quality diamond blade is usually the right choice for clean straight cuts, while internal corners may require controlled plunge cuts and careful finishing. Excess pressure at the corners can cause cracking, particularly with thick porcelain or large-format slabs.
After cutting, test the tile against the installation frame before applying adhesive. This dry-fit step is the practical safeguard that protects the finish. Check that the opening aligns with the frame, leaves adequate clearance, and allows the visible flush plate to sit correctly after the tile reaches its final depth.
When setting the tile, keep the surface level around the opening. Excess adhesive, uneven support, or a tile that is slightly proud on one side can affect the final fit of a recessed plate. Clean the opening edges before the adhesive cures, then follow the system-specific instructions for fitting the mounting parts and flush plate.
The goal is not simply to make the plate fit. The goal is for the tile wall, the opening, and the control surface to read as one precise composition.
Common mistakes that compromise the finish
The most frequent mistake is cutting from a rough measurement instead of using the correct reference template. Even when the dimensions appear correct on paper, the opening can shift due to wall build-up or the actual position of the installation frame.
Another issue is choosing the flush plate too late. If the plate is changed after tile layout is complete, its dimensions or mounting requirements may no longer suit the prepared opening. A luxury bathroom should not be forced into a compromise because a visible component was treated as an afterthought.
Installers should also avoid assuming that the flush plate will hide every tile edge. It may conceal a narrow tolerance, but it is not intended to cover irregular cuts or oversized holes. Clean edges remain necessary, particularly with recessed installations and light-colored tile where shadows make gaps more noticeable.
Finally, do not overlook future service access. The flush plate opening provides access to key cistern components. A tile cut that obstructs the mounting system can turn routine maintenance into unnecessary wall work.
A small tool with a visible impact
The value of a template is easy to underestimate because it is used only during installation. Yet its effect remains visible for years. It protects the clean geometry of the flush plate, supports accurate service access, and prevents a high-end tile wall from being weakened by an imprecise opening.
For homeowners, that means a bathroom with fewer distracting details and a more finished appearance. For tile professionals, it means a controlled process that reduces corrections on expensive materials. For designers, it means the wall can maintain the quiet, integrated look intended in the original concept.
PS-Tile approaches these technical details as part of the finished interior, not as hidden construction work. A Grohe-compatible template is a practical tool, but it also serves a larger purpose: making the visible result feel clean, elegant, and intentionally built.
When choosing the tile, flush plate, and concealed system, decide on the template at the same time. That single planning decision gives the installer a clear reference and gives the finished bathroom the calm precision that premium architecture demands.
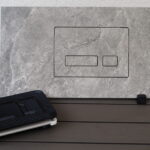
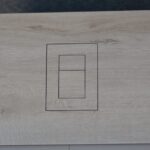

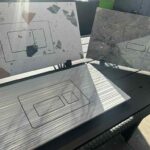
[…] Grohe template gives the installer a reliable reference point for a clean opening, helping the final plate sit […]
[…] opening must remain square, and the panel must sit flush without binding. This is where a dedicated template for the Grohe system becomes more than an installation aid. It creates a controlled opening that supports an elegant, […]