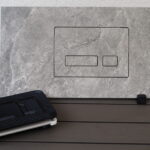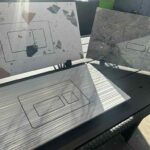
A concealed bathroom detail only looks luxurious when the tilework around it is precise. One chipped hole can interrupt an otherwise clean wall plane, especially around a recessed toilet paper holder, towel hook, flush plate, or built-in waste bin. To drill porcelain without cracking, the process must be controlled from the first mark to the final tightening of the fixture.
Porcelain is not difficult because it is fragile. It is difficult because it is dense, hard, and often finished with a smooth glaze that lets an ordinary drill bit wander. The right tooling, low-speed drilling, and consistent cooling turn a high-risk task into a repeatable installation detail.
Why porcelain cracks around drilled holes
Porcelain tile is fired at high temperatures and has very low water absorption. That density gives it the refined, durable surface valued in modern bathrooms, but it also means the material resists cutting. When a bit creates too much heat, catches suddenly, or is forced through the tile, stress concentrates at the hole edge. The result may be a visible chip, a hairline crack, or damage that appears only after the screw is tightened.
The risk is higher with large-format tile, polished porcelain, thin slabs, and tiles installed over a wall surface with voids behind them. A tile that is not fully supported can flex under drilling pressure. Even a technically correct hole can fail if an anchor expands aggressively inside the tile or if a fixture is tightened against it without a protective spacer.
For premium bathroom work, the objective is not simply to get through the tile. It is to create a clean, circular opening that supports the installation without becoming a visual distraction.
Use the right bit before you start drilling
A standard twist bit designed for wood or metal is not the correct tool for porcelain. It may skate across the surface, overheat immediately, and chip the glaze before it gains purchase. For small mounting holes, use a diamond tile drill bit. For larger openings, such as pipe penetrations or integrated accessory cutouts, use a diamond core bit sized for the component and the required clearance.
Carbide-tipped masonry bits can work on softer ceramic tile, but porcelain demands more patience and usually delivers cleaner results with diamond tooling. The difference becomes especially noticeable on dark, matte, polished, or stone-look surfaces where even a small edge chip catches the eye.
Match the hole diameter to the mounting method. Do not make a hole smaller than required and force a screw or anchor through it. That pressure can split the tile after the drilling appears successful. Likewise, avoid oversized holes where the fixture will no longer sit centered or stable.
Prepare the drilling point
Measure from finished edges, grout joints, and the fixture itself rather than relying on a rough visual estimate. In a minimalist bathroom, alignment matters. A recessed accessory or wall-mounted element that is a few millimeters off-center can disturb the intended order of the entire composition.
Place a small piece of painter’s tape over the drilling point and mark the center on the tape. The tape helps reduce bit wander on a glossy surface. For repeated professional installations, a drilling guide or template provides even better control, particularly when several holes must align with a concealed system or mounting plate.
Before drilling, confirm what is behind the tile. In a bathroom wall, that may include waterproofing, plumbing, electrical wiring, a concealed cistern, or a metal stud. The cleanest tile hole is not useful if it compromises a hidden technical layer.
How to drill porcelain without cracking tile
Start with the drill set to rotary mode only. Do not use hammer mode on porcelain. Impact action sends repeated shocks into a brittle surface and can chip the glaze or create cracks beyond the drilled opening.
Hold the drill square to the tile and begin at a slow speed. Let the diamond edge abrade the surface rather than trying to punch through it. With a small diamond bit, light and steady pressure is enough. If the drill labors, squeals, or produces excessive dust, reduce pressure and check that the bit is being cooled.
Cooling is essential. Heat is the enemy of both the tile and the diamond bit. For a vertical wall, use a spray bottle to apply a light, continuous mist to the drilling area, or have a second person cool the bit while you drill. Keep water away from the drill motor, electrical connections, and surrounding unfinished work. A damp sponge held just below the hole can also catch slurry and help control splashing.
Drill until you reach the tile backing, then pause. The material behind the porcelain may require a different bit and technique. For example, a masonry substrate can be drilled with an appropriate masonry bit after the porcelain opening is complete. A wood stud calls for a wood or multipurpose bit. Changing tools at this point protects the finished tile edge from unnecessary force.
Do not rush the final breakthrough. As the bit reaches the back of the tile, reduce pressure further. This is where many chips occur, especially if the tile has a hollow area behind it. A controlled exit preserves a crisp edge on the visible face.
For larger holes, create a stable starting point
Diamond core bits are ideal for larger openings, but their wide rim can skate on a polished tile surface. A guide plate is the most precise solution. If one is not available, begin the core bit at a slight angle to establish a shallow groove, then gradually bring the drill upright once the rim has a secure track. This requires a steady hand, so a guide remains the better choice for highly visible work.
Use low speed, moderate water cooling, and minimal pressure. Periodically lift the bit slightly to let water reach the cutting edge and clear slurry from the hole. Never use hammer mode with a core bit on porcelain.
When cutting openings for built-in bathroom elements, measure the finished visible frame as well as the installation body behind the wall. A cutout that is technically large enough but poorly centered can leave uneven joints or expose an unwanted edge. Precision here supports the clean, integrated effect that makes concealed accessories feel intentional rather than added on.
The mounting step can still crack the tile
A perfect hole does not guarantee a perfect installation. Cracking often happens afterward, when a screw is overtightened or an unsuitable anchor expands against the porcelain.
Choose anchors based on the substrate, not the tile alone. The tile is a finish surface, not the structural support. Where possible, fasten into solid backing, blocking, or an appropriate wall anchor designed for the cavity behind the tile. Tighten screws by hand for the final turns. A power driver can apply too much torque before you notice the fixture is fully seated.
If a mounting plate sits against the tile, make sure its back is clean and flat. A grain of grout, tile chip, or uneven bracket can create a pressure point. Use any supplied gasket, washer, or spacer intended to protect the finish. The fixture should sit secure and flush, never forced against the tile.
This is especially relevant for accessories used daily. A hook, toilet paper holder, or wall-mounted rail experiences repeated lateral force. Proper backing and measured tightening preserve both the functionality of the accessory and the uninterrupted appearance of the tile surface.
Common mistakes that ruin a clean finish
Most failed porcelain holes come down to speed, heat, or pressure. The following mistakes are worth avoiding:
- Using a standard metal, wood, or worn masonry bit instead of a sharp diamond bit.
- Activating hammer mode or drilling at maximum speed.
- Skipping water cooling and overheating the bit or tile glaze.
- Pushing hard when the bit slows instead of letting the diamond abrasive cut.
- Drilling into an unsupported area of tile without reducing pressure near breakthrough.
- Using an anchor that expands too aggressively or overtightening the final screw.
A dull bit deserves particular attention. Diamond bits do not always look worn at a glance, yet their cutting performance declines. If drilling becomes noticeably slow, generates more heat than usual, or leaves rough edges, replace the bit rather than forcing it through one more hole.
When not to drill the installed tile
Sometimes the better decision is to change the installation plan. If you suspect pipes or wiring behind the selected location, if the tile is already cracked, or if a large-format slab has poor support, stop before drilling. The cost of repositioning an accessory is far lower than replacing a finished wall section.
For new construction and major renovations, plan integrated details before tiling whenever possible. Recessed accessories, concealed mounting systems, and installation templates allow the wall to be prepared around the component, reducing visible hardware and avoiding unnecessary holes in the finished surface. This approach creates a bathroom with cleaner lines, easier maintenance, and fewer disruptive elements.
A porcelain surface rewards restraint. Use the correct diamond tool, keep the cutting edge cool, and let the bit do the work. The result is not merely an intact tile, but a precise opening that allows every built-in detail to sit quietly in a bathroom designed for order, function, and lasting visual calm.